Thursday, July 5, 2012

Covered Untangled Cozy Earbuds


I finished the covered cozy earbuds today! Not too bad for starting it 24 hours before finishing it.... and I know if sleeping and doing some errands didn't get in the way it would have been completed a lot sooner!


I love it so much!! I really want to make more and whip out a ton, not really sure for what.... maybe Christmas gifts for the niece and nephews. While I used worsted weight yarn and size 5 double pointed knitting needles, I think I might try one in a fingering yarn and smaller needles. So it's not as bulky. I'll have to see what it looks like, even though I really enjoy the ones I just finished. I also think a less uniformed variegated yarn would make it look classy.


While the original pattern that I found came from Ravelry. It's a pattern called Untangled. I ended up looking at the design and wanted something a little different.

In her pattern she started at one of the earbuds, and worked her way down, stopping at the V. She binded off at the V, and started new all of the way down. While I do like the style, I wanted to cover up the whole area! I also didn't want to keep starting and stopping. So for my pattern, it's a little different.


Please keep in mind, I am still a beginner knitter! I still have a hard time with reading patterns, let alone writing them. So my pattern may be a little "different" than others! Please read the whole thing before starting.


I used worsted weight yarn and size 5 double pointed knitting needles.

You start by casting on 3.
You then slide your work to the right end of the needle, place the wire to the earbuds behind your work and knit 3.
Slide your work to the right, and knit 3 again.

What you are making is an i-cord, and here is the video that helped me out a lot!

The trick... however... to wrapping it around your earbuds is very simple!! You need to make sure that your yarn from the left, before you knit your first stitch every row, is behind the wire to your earbuds. What I did was wrap up the cord with a rubber band so I could easily flip it over the yarn. You will have to do that every time you slide your work to the right. It might seem a little tedious, but it is so worth it!

I started from the bottom plug part of the cord and worked my way up to the V. When I reached the V, I increased one stitch for the next 3 rounds. I used the video tutorial here by Making 1 {M1}.

So now you will have a total of 6 stitches on your needle. Keep knitting those in the same i-cord pattern until you have reached the top of your V.


I used a saftey pin to hold three of the stitches and I slipped them off my needle. You can see the saftey pin in the picture above, holding the three stitches for the other earbud. When you have only 3 stitches back on your needle, you may start working the i-cord up one side of the earbud. Work all the way up to the ear piece and bind off.

When it comes time to work on the other side, join in your yarn (I liked this tutorial where they changed colors... it's essentially the same thing). Then start working your way up again!

If you have one like mine, that has the microphone. I binded off just below the microphone and started brand new just above. Bind off when you're all finished, and then tuck in your leftovers!

Remember, please keep in mind that I am not a well pattern writer for knitting. I'm just describing to you what I did, so if there's any way I can try to make it easier, please let me know!

I really want to make a step by step picture tutorial for this.... someday! I think it might be a little easier to follow that way.

Wednesday, July 4, 2012

WIPW: Work-In-Progress Wednesday


So what have I been working on since I finished my big grannies and ripples afghan? Well, a couple of different items!

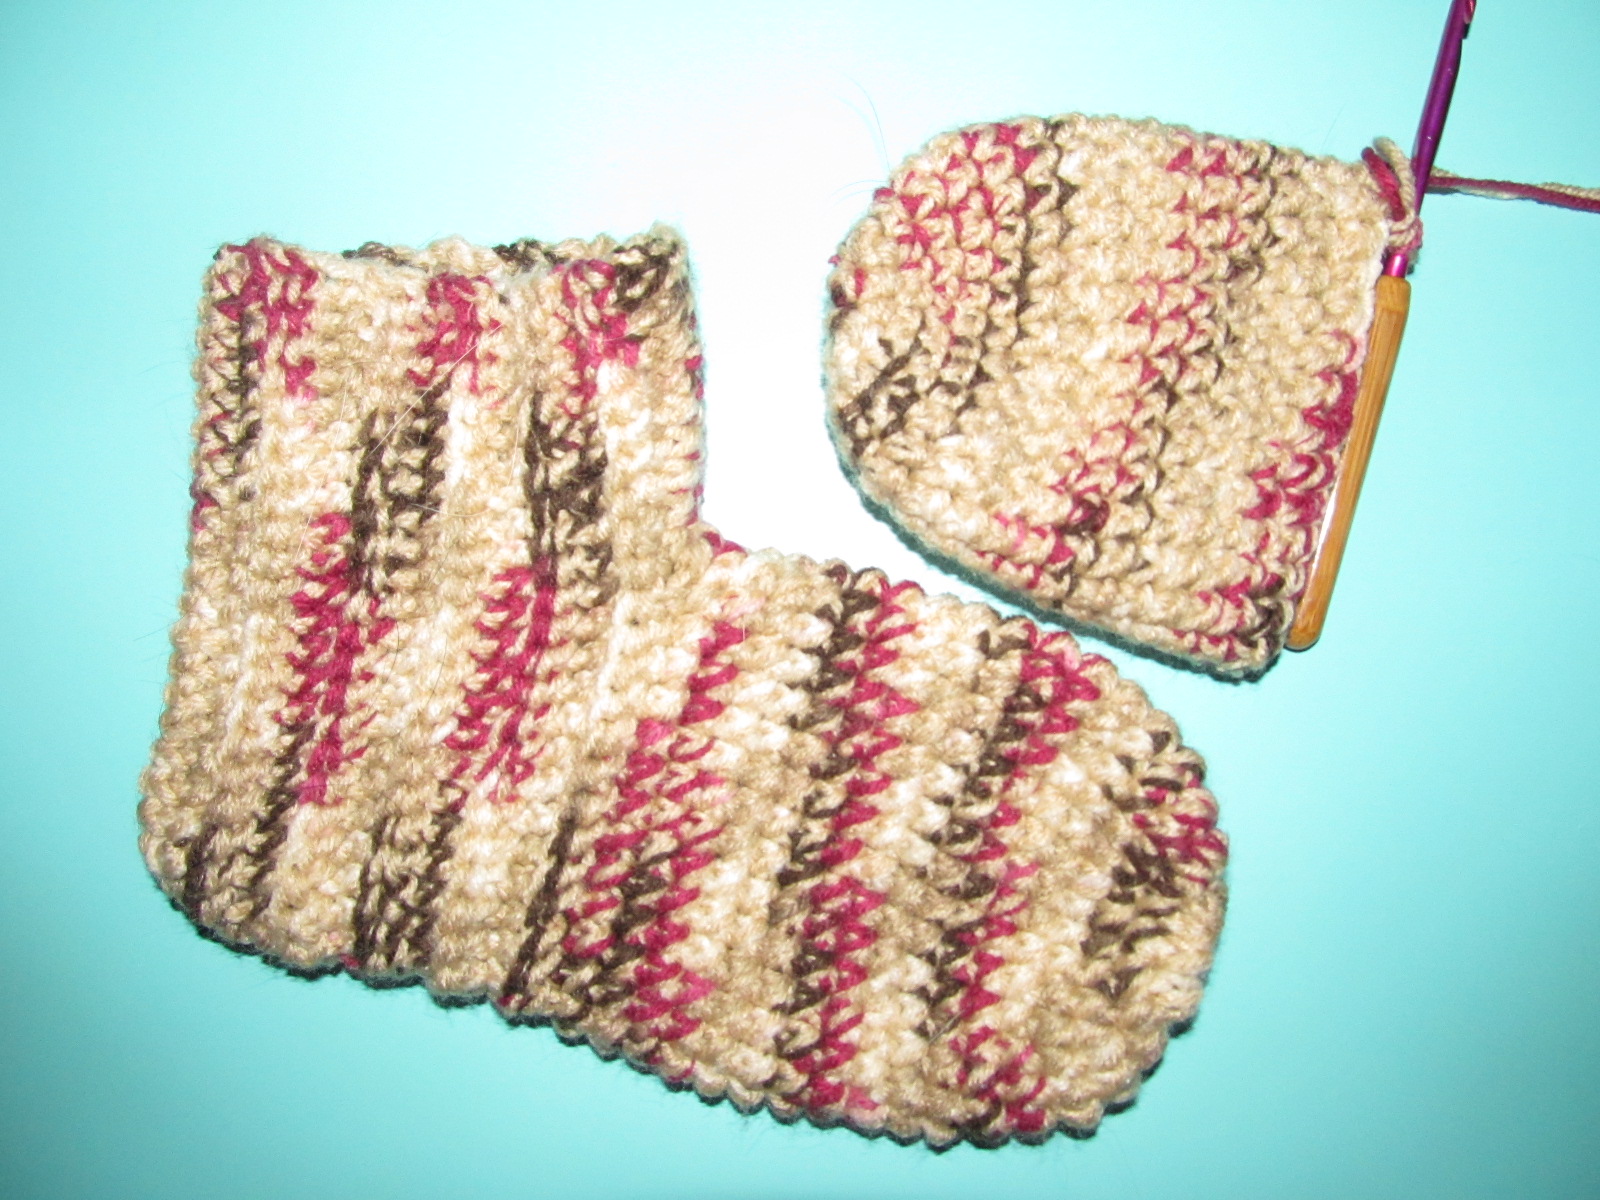
I decided to start making Christmas gifts, so I can get a good stock going and won't feel rushed. So, I started on some slippers.


I love these slipper socks! They were the very first thing I crocheted after my little test swatches. They are so quick to make, and are warm in the winter!!!

The only thing I have to remember is that my gauge is tight. This is a womans size, but it'll have to be for someone with size 6 or 7 feet. I either have to use a bigger hook, or make it bigger when i'm working on it.


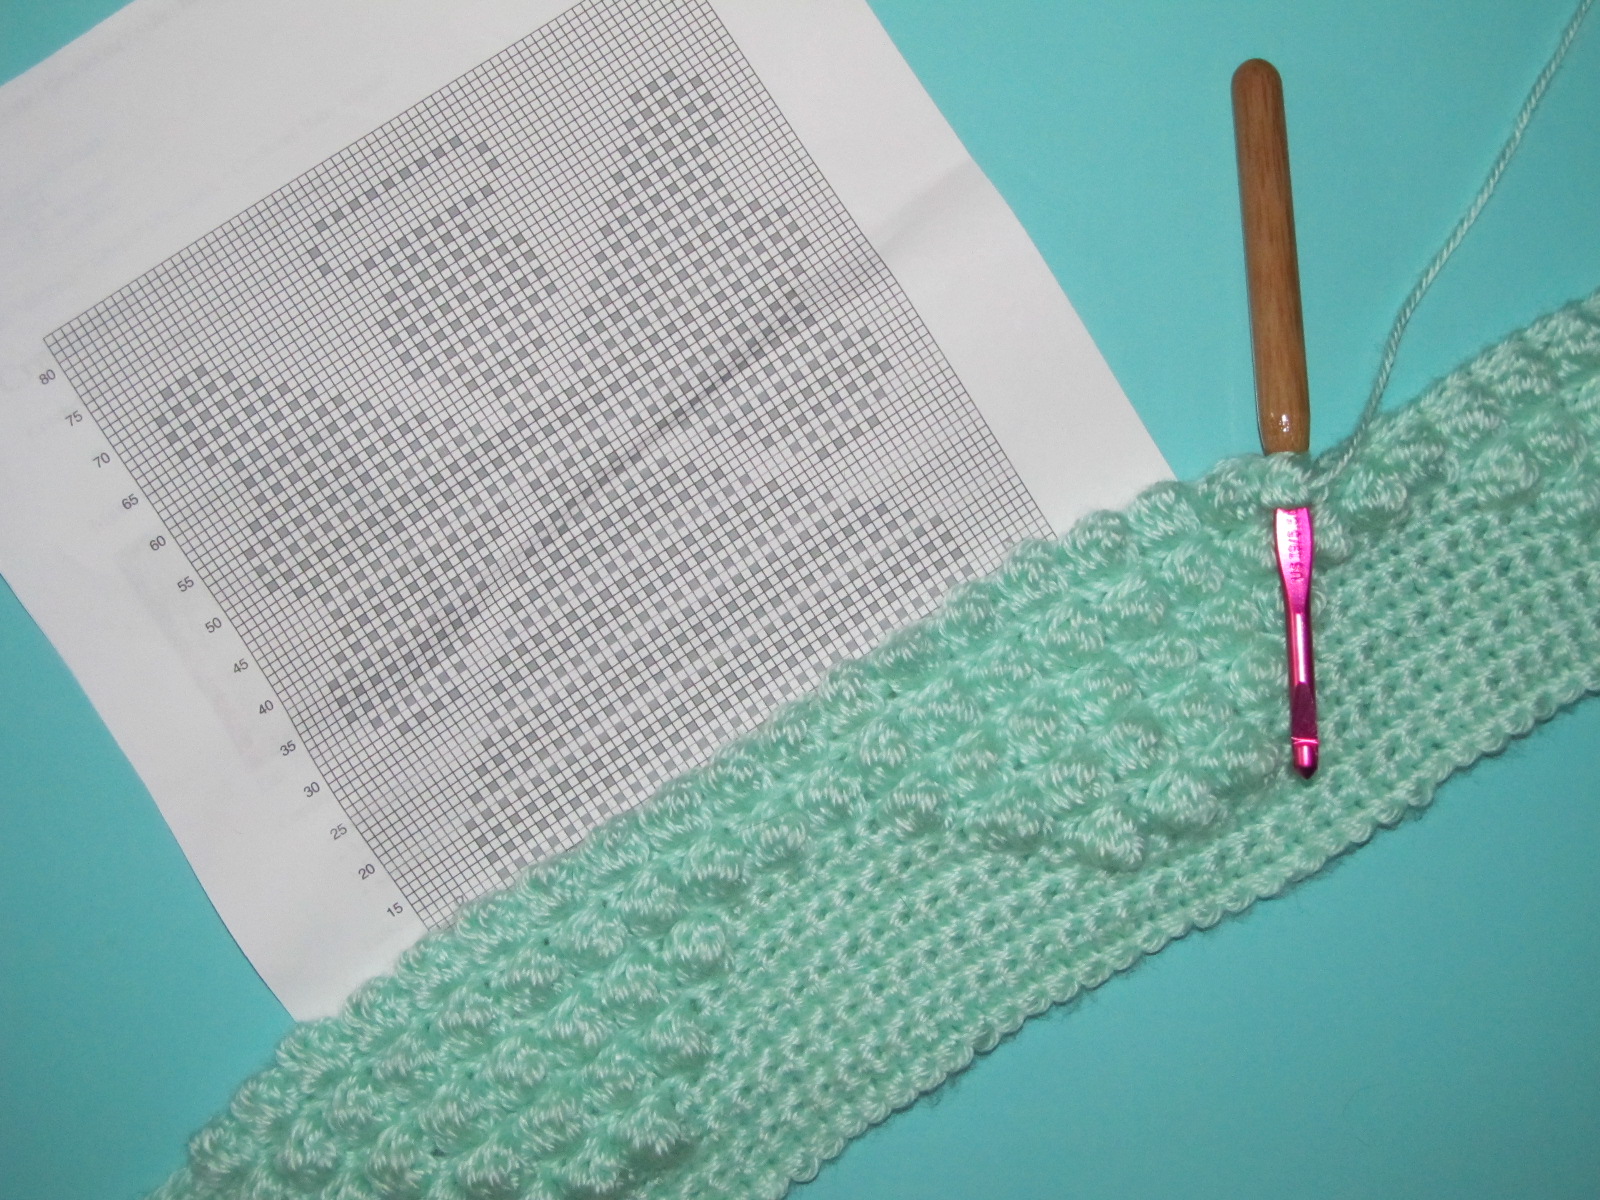
I also started working on a baby blanket, with yarn that Debi Y gave me!


I am so looking forward to seeing this finished!!! My grandmother suggested another way to make this, instead of the popcorn stitches. I think i'll have to try her version next.


And a third thing I started working on, were earbud covers! I really want to start listening to books on tape while I crochet and knit. I finally found out how to download audio books from my local library onto my phone.

Then, I checked out Willow4's WIPW post that she linked up with me from last week, and found the pattern to knit earbud covers so they do not get tangled!


I "stitch-n-bitch" with 4 other ladies once a week, and I started this project last night! I just have one more earbud to finish, and then I can start listening to my audio book while I crochet! I'm so very excited!!!

I did start listening to The Best Of Me by Nicholas Sparks. I am also reading The Descendants by Kaui Hart Hemmings.


What have you worked on this week? You can always link up with me!
I am linking this bad boy up over at Tami's WIP, Ambassador Crochet, Yarn Along, and SusanD's.


Sunday, July 1, 2012

Granny and Granny Ripples Afghan


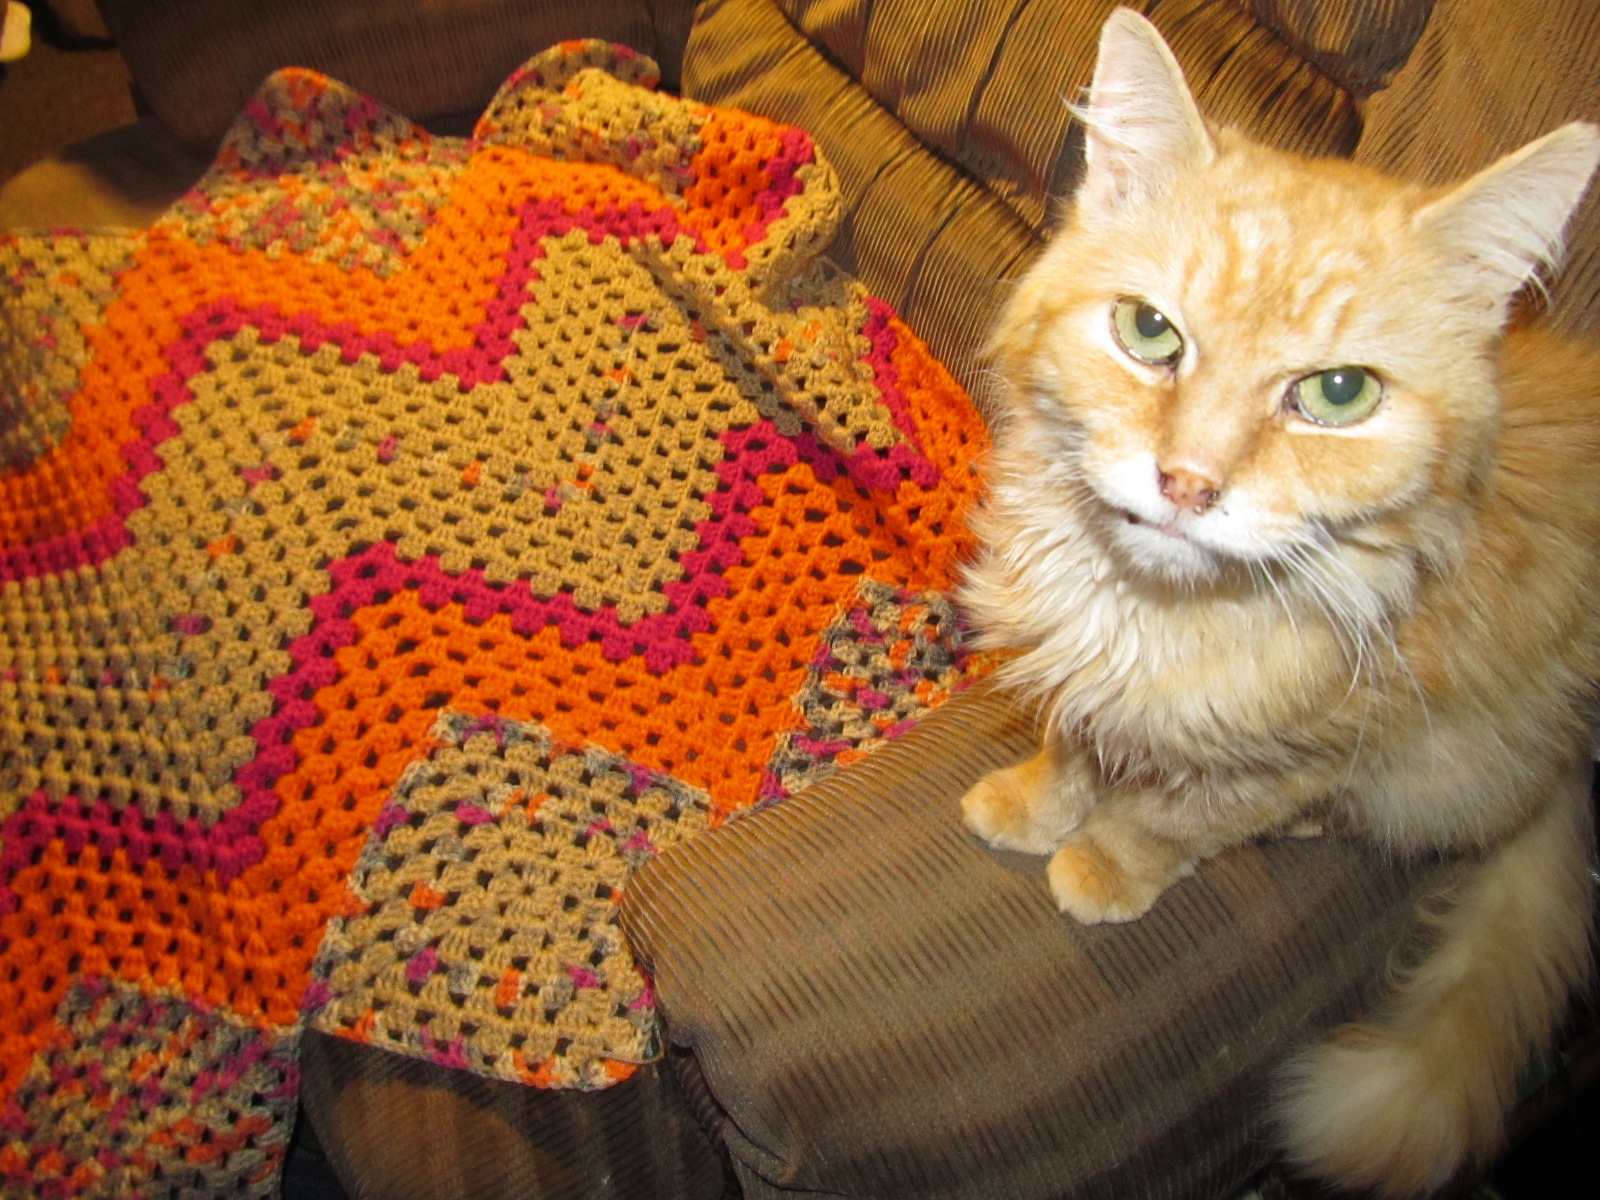
I cannot believe it... but it's finished!!! The Granny and Granny Ripples Afghan is now finished, and in a bag ready to give away as a Christmas gift!


This is bigger than my Granny and Ripples Afghan that I made earlier this year. Where this could probably fit a double bed, and the one before was only a big lapghan.

There are 3 strips of granny squares, and I first started with 6" squares. Then attached 5 of the 6" squares together to make a strip! I had to make half grannies for the middle strip of squares, along with 4 whole grannies.

Granny and Granny Ripples Afghan
You'll need worsted weight yarn or various colors, and size H (5mm) crochet hook.
Gauge is not critical for this project.


First Granny Square Strip:
First Granny Square
To Start: ch 4; join with sl st in first ch to form a ring.
Round 1: Ch 3 (counts as dc here and throughout), 2 dc in ring, [ch 1, 3 dc in ring] 3 times, ch 1; join with sl st in top of beginning ch—12 dc and 4 ch-1 sps. Fasten off.
Round 2: Join with sl st in any ch-1 sp, ch 3, (2 dc, ch 1, 3 dc) in same ch-1 sp, *ch 1, (3 dc, ch 1, 3 dc) in next ch-1 sp (corner made); repeat from * 2 more times, ch 1; join with sl st in top of beginning ch—4 corners and 1 ch-1 sp one each side between corners. Fasten off.
Round 3: Join with sl st in any corner ch-1 sp, ch 3, (2 dc, ch 1, 3 dc) in same ch-1 sp, ch 1, 3 dc in next ch-1 sp, ch 1, *(3 dc, ch 1, 3 dc) in next corner ch-1 sp, ch 1, 3 dc in next ch-1 sp; repeat from * 2 more times; ch 1, join with sl st in top of beginning ch—4 corners, and one 3-dc group and 2 ch-1 sps on each side between corners. Fasten off.
Round 4: Join with sl st in any corner ch-1 sp, ch 3, (2 dc, ch 1, 3 dc) in same ch-1 sp, 3 dc in next 2 ch-1 sps, *(3 dc, ch 1, 3 dc) in next corner ch-1 sp, 3 dc in next 2 ch-1 sps; repeat from * 2 more times; join with sl st in top of beginning ch—4 corners, and one 3-dc group and 2 ch-1 sps on each side between corners. Fasten off.
Round 5-7: Continue in this pattern until the 7th round is completed. Fasten off.

Next Granny Square
Work same as first granny square through Round 6.
Round 7 (joining round): Join with sl st in any corner ch-1 sp, ch 3, (2 dc, ch 1, 3 dc) in same ch-1 sp, 3 dc in next 2 ch-1 sps, *(3 dc, ch 1, 3 dc) in next corner ch-1 sp, 3 dc in next 2 ch-1 sps; repeat from * once more, 3 dc in ­next corner ch-1 sp, hold WS of this square and previous square together, sl st in corresponding corner ch-1 sp of previous square, ch 1, 3 dc in same corner ch-1 sp of this square, 3 dc in next 2 ch-1 sps; join with sl st in top of beginning ch—4 corners, and one 3-dc group and 2 ch-1 sps on each side between corners. Fasten off.

Make and join more granny squares in this manner, making a strip of how many granny squares long that you'd want it.


Ripple Pattern #1
To Start: With RS one granny square strip #1 facing, join with sl st in corner ch-1 sp beginning of first full granny square, to work across top of strip from first full granny square across to half granny square.
Row 1: Ch 5, *{3dc in next ch 1 sp, ch 1} repeat until you reach the top corner, {3dc, ch 1, 3dc} in top corner, {3dc in next ch 1 sp, ch 1} repeat until you reach the bottom corner, DO NOT ch 1, 3dc in next ch 1 sp going up the next granny, ch 1; repeat from * until you have reached the end, ch 3 and sl st into corner of the last granny, turn.


You will continue working the same row pattern until desired length. If you want, you may work on both sides of the granny strip.


Your second granny square strip will not be made in a strip. You will make each individual square and attach it to the blanket one at a time. You will be using a method similar to the one in this tutorial here.

Second Granny Square Strip:
Half Granny Square
To Start: ch 4; join with sl st in first ch to form a ring.
Row 1: Ch 4 (counts as dc, ch 1 here and throughout), (3 dc, ch 1, 3 dc) in ring (corner made), ch 1, dc in ring; do not join—1 corner, and 1 ch-1 sp and 1 dc on each side of corner. Fasten off.
Row 2: Join with sl st in 3rd ch of beginning ch-4, ch 4, 3 dc in beginning ch-sp, ch 1, (3 dc, ch 1, 3 dc) in next ch-1 sp, ch 1, 3 dc in last ch-1 sp, ch 1, dc in last dc—1 corner, and 2 ch-1 sps, one 3-dc group, and one dc on each side of corner. Fasten off.
Row 3: Join with sl st in 3rd ch of beginning ch-4, ch 4, 3 dc in beginning ch-sp, ch 1, 3 dc in next ch-1 sp, ch 1, (3 dc, ch 1, 3 dc) in next ch-1 sp, [ch 1, 3 dc in next ch-1 sp] twice, ch 1, dc in last dc—1 corner, and 3 ch-1 sps, two 3-dc groups, and one dc on each side of corner. Fasten off.
Row 4: Join with sl st in 3rd ch of beginning ch-4, ch 3, 3 dc in each ch-1 sp to corner ch-1 sp, 3 dc in corner ch-1 sp, hold WS of this half square and last square of strip together, sl st in corresponding corner ch-1 sp of last square of strip, ch 1, 3 dc in same corner ch-1 sp of this half square, 3 dc in each ch-1 sp across, dc in last dc—1 corner, and three 3-dc groups and one dc on each side of corner. Fasten off.
Row 5-6: Continue in same pattern.
Row 7: Join with sl st in 3rd ch of beginning ch-4, ch 3, 3 dc in each ch-1 sp to corner ch-1 sp, 3 dc in corner, CH-1 INTO PEAK OF GRANNY RIPPLE, 3 dc in same corner sp, ch-1 into ch-1 sp of granny ripple, continue this pattern until the last sp, ch-1 into corner sp of ripple, dc into corner. Fasten off.

Whole Granny Square
To Start: ch 4; join with sl st in first ch to form a ring.
Round 1: Ch 3 (counts as dc here and throughout), 2 dc in ring, [ch 1, 3 dc in ring] 3 times, ch 1; join with sl st in top of beginning ch—12 dc and 4 ch-1 sps. Fasten off.
Round 2: Join with sl st in any ch-1 sp, ch 3, (2 dc, ch 1, 3 dc) in same ch-1 sp, *ch 1, (3 dc, ch 1, 3 dc) in next ch-1 sp (corner made); repeat from * 2 more times, ch 1; join with sl st in top of beginning ch—4 corners and 1 ch-1 sp one each side between corners. Fasten off.
Round 3: Join with sl st in any corner ch-1 sp, ch 3, (2 dc, ch 1, 3 dc) in same ch-1 sp, ch 1, 3 dc in next ch-1 sp, ch 1, *(3 dc, ch 1, 3 dc) in next corner ch-1 sp, ch 1, 3 dc in next ch-1 sp; repeat from * 2 more times; ch 1, join with sl st in top of beginning ch—4 corners, and one 3-dc group and 2 ch-1 sps on each side between corners. Fasten off.
Round 4: Join with sl st in any corner ch-1 sp, ch 3, (2 dc, ch 1, 3 dc) in same ch-1 sp, 3 dc in next 2 ch-1 sps, *(3 dc, ch 1, 3 dc) in next corner ch-1 sp, 3 dc in next 2 ch-1 sps; repeat from * 2 more times; join with sl st in top of beginning ch—4 corners, and one 3-dc group and 2 ch-1 sps on each side between corners. Fasten off.
Round 5-6: Continue in this pattern until the 7th round is completed. Fasten off.
Round 7: Join with sl st in any corner ch-1 sp, ch 3, (2 dc, ch 1, 3 dc) in same ch-1 sp, 3 dc in next 2 ch-1 sps, 3 dc in corner, CH-1 INTO PEAK OF GRANNY RIPPLE, 3 dc in same corner sp, ch-1 into ch-1 sp of granny ripple, continue this pattern until you no longer have anything to ch-1 into. Continue pattern of 3dc in ch-1 sps, sl st into beginning ch, Fasten off.


Ripple Pattern #2
To Start: With RS one granny square strip #2 facing, join with sl st in first dc at top of half granny square.
Row 1: ch 4, 3dc into same sp, {3dc in next ch 1 sp, ch 1} repeat until you reach the bottom corner, DO NOT ch 1, 3dc in next ch 1 sp going up the next granny, ch 1, {3dc in next ch 1 sp, ch 1} repeat until you reach the top corner, {3dc, ch 1, 3dc} in top corner; continue pattern until last ch-1 sp. {3dc, ch1, dc} into last ch-1 sp. Fasten off.


You will continue working the same row pattern until desired length.


Edging
Row 1 : With RS facing, join with sc at beginning of one long edge, sc evenly spaced across long edge (work 4 sc in the end of each row), sl st into beginning st, Fasten Off.


This style afghan is all about pattern. Once you know how to create one row, you'll be able to make a blanket with whatever pattern you would like! You can choose to have 5 or 6 rows of grannies if you wish!

Good luck!

Sad day for me

My pretty orange kitty that loved my current Grannies and Ripples afghan that I was making died yesterday. He had kidney failure and we were expecting him to pass, just not this soon.


We had another kitty before we rescued him that died of kidney failure. She showed many advanced signs of the disease for a few weeks. Ted, our orange kitty, didn't. Just the day before he was his normal self, running and playing, and yelling at me. :) But when I woke up yesterday morning, he couldn't move. So I just held him until he passed away in my arms.


We are a heartbroken family right now. Our pets are our family members, and we just said goodbye to a very handsome boy.

Wednesday, June 27, 2012

WIPW: Work-In-Progress Wednesday


This is all you get today of my grannies and ripples! I am about 8 rows and a border away from finishing, and i'm hoping that by next Wednesday i'll have the pattern posted!!

By the way, this was on my bed and I was measuring to find out exactly how long I wanted to make it.... and when this kitty jumped up on the bed, the afghan scared him!! It was way too cute. :)


I have also been working on my other secret project, and i'm just about to a point of a standstill for a little while, so maybe i'll post that one this week too.

But that's it! I've only worked on those two things this week.

I am linking this bad boy up over at Tami's WIP, Ambassador Crochet, Yarn Along, and SusanD's.


Sunday, June 24, 2012

Crochet Symbols

For all those patterns that you absolutely love, but don't know how to make them from the picture.


"Other Craft"

Ready for more of that "other" craft? And yes, I have decided baking/cooking is totally a craft! Because you really need to be skilled to do it well. Ever since I made my strawberry rhubarb dump cake I have been on a strawberry rhubarb kick. I love strawberry rhubarb jam, but never really wanted to spend the money to get it from a farmers market... because $6 a jar seems so expensive! {Well, compared to Smuckers}

So, since i've been on this kick, I thought i'd try my hand at making my own jam. Which is a big feat for me! I like things as easy as possible when it comes to the kitchen. I looked at a ton of recipes, and finally found one that seemed easy enough for me to make, but it didn't include adding actual strawberries. So I played around, and added strawberries! I am in love with my new jam! And... it's so stinking simple!!!


This is the recipe that I made.... Of course you can always cut this in half if you wanted to. This recipe made 3 pint jars and 4 half pint jars. So 5 pints of jam total.


Ingredients
8 cups chopped rhubarb
2 cups sliced strawberries
4 cups sugar
1/3 cup orange juice
2 packages of strawberry jello


Instructions
1. Cut up your rhubarb in to 1/4" pieces and place them in a bowl.
2. Add in the sugar and orange juice, mix it around and let it sit for about an hour.
3. In the meantime, slice up your strawberries and sterilize your jars.
4. When the rhubarb is ready, pour the mixture in a pot. Add strawberries. Cook on medium/high heat, stirring often for about 12-15 minutes - until the mixture is mostly liquid {with a few chunks that make the jam delish!}
5. Remove from heat and add in the packages of jello and stir.
6. Pour the mixture into jars and place them in the refrigerator to settle. Your jam will be ready in a few hours!


See how simple!? And honestly, this tastes just as good as the stuff that takes more time to make. Enjoy your jam!


To add in a little crochet to this post, I've entered a contest over at Not Your Average Crochet to win this prize package. The giveaway ends on 6/26/12.


Saturday, June 23, 2012

Thank you Debi Y!


Today when I went to check the mail, I was expecting a package of something that I had ordered.... however, I wasn't expecting a package from Debi Y from Dly's Hooks and Yarns! In the box from Debi were 6 skeins of yarn! Caron Simply Soft too... which I love!


Thank you so much Debi!! I'm now going to scout out some new patterns to try and get working on a few more baby blankets to donate for the care packages! I'll be sure to post pictures when I finish!

Wednesday, June 20, 2012

WIPW: Work-In-Progress Wednesday


I did not get a lot of crocheting done this week. I was busy helping a friend plan a 30th birthday party for her boyfriend, Fathers Day we spent the whole day out, then on Monday I spent most of my time finishing up 50 Shades Freed.

However, I did get a few rows on my afghan completed!


I also finished sewing on the rest of the granny squares I have from friends and family members. This is all I have right now, and I hope some family members can give me a square or two soon.


And here is my Year Of Scraps project for June {Month #2}! My yarn weighs .50 oz!


Boy, you can't tell what i've mainly been working on, can you?? ;)


I am linking this bad boy up over at Tami's WIP, Ambassador Crochet, Yarn Along, and SusanD's.

You can link up with me if you want!


Tuesday, June 19, 2012

My kitty again!

More evidence that my kitty just loves the Granny squares and ripples afghan!

Thursday, June 14, 2012

Baby Blankets


About a month ago I posted about collecting baby blankets for a local mission. It's a mission that hits very near and dear to my heart, and these blankets will go into care packages to be delivered to hospitals.

Thanks to the kind people I work with, and family members, I have already collected a handful of blankets! They range from tiny to big, and are gender specific or gender neutral. Babies are born at different gestational ages, and sometimes a huge blanket would not fit a baby born at 25 weeks.


This blanket is one I've been working on in my spare time. I updated it in a WIPW post a few weeks back. I finished it last night and am very proud. It's one of the smaller blankets, but it can also be stretched.... which is why I like the pattern. The picture really does not do this blanket justice.

I found the pattern at Mini Frippery. It's a fairly simple pattern! I changed the last row, just a tiny smidge.

Row 1: Using this technique of a no chain foundation, 122 dc
Row 2: ch 3, 3 dc in next dc. (ch3, sk next 2 dc, 3 dc in next dc) 40 times. DC in last dc
Row 3: ch 3, (working behind the ch 3 of previous round, 3 Bpdc in 1st dc in 3 dc set, ch 3) 40 times. 3 bpdc in 1st dc in last 3 dc set. Dc in last turning ch of previous row.

Repeat row three until desired length

Last row: ch 3, (dc in next 3 dc, dc in ch 3 sp ) repeat to the end of the row. Dc in last turning ch. fasten off and weave in ends.


Here is a blanket a friend made.


I absolutely love the detail of this blanket!! I must ask her for the pattern, because it is just beautiful. It is worked in a round, but a rectangular round. It's just beautiful.


Here's one blanket that a co-worker made.

Very simple, and yet beautiful! These blankets are going to be such a nice touch to the care packages. Something hand made with love, in memory of all babies in heaven.


Here's another blanket a co-worker made.

Again, so simple and beautiful!!


And this blanket, I actually made for my nephew when he was born. I had to finish it up after his baby shower... and I honestly never got around to giving it to my sister-in-law. Seeing that my nephew is almost 8 years old, I don't think they'll mind if I donate it.

I wish I had put a border around it. But it was my first granny square blanket ever. As small as it is... it took 7 years until I made another one!


I'll be collecting baby blankets for ever to donate, as unfortunately, there will always be families grieving the loss of a baby.

Wednesday, June 13, 2012

WIPW: Work-In-Progress Wednesday


I had to count all of my projects that I have going right now.... just to see how many I have started and haven't finished. I have 6!! I need to finish some of these bad boys up!

For you today, are two of them that I have made progress on since the last time I posted.


The Grannies and Ripples {Take 2} is one of them. Not only did I add on past the grannies from last week, but I added on to the beginning grannies at the bottom. I figured a border before the real border would make it look better. I'm excited that i'm almost half way done with the afghan!

The other thing that I started this week, is my plarn bag! I have been collecting plastic bags, cutting them up and making a ball of plarn for months now. The ball has just been sitting there, so I decided it was about time that I get started on it.


I mentioned to someone that the next one I make I wanted to use only the same color bags.... but the more I look at this, the more i like the variegated look.

I really hope the plarn bag works well! It is a lot slower to work with than regular yarn, and I have also learned that those thicker plastic bags are not good to crochet with! I thought that the thicker bags would hold up better... and i'm sure they will. But they are a pain to crochet with!


I am linking this bad boy up over at Tami's WIP, Ambassador Crochet, Yarn Along, SusanD's and The Crochet Way.

Well, that's what I am working on right now!


Tuesday, June 12, 2012

10" Square

Who is the biggest project starter in the world!??! Well, I'm sure there are others worse than I am, but I have to be up there on the list.

I started a new afghan. It's actually a practice one, before I make the one that will really mean something special to me. I actually kind of want to make it a secret new project too... until i'm at least part way finished with it.

But, in this new afghan I do have a new square! It's a 10" square, one of the biggest I have ever made.


Isn't it beautiful!?? I really hope it looks great with the rest of the blanket once I am finished with it!

To make this 10" Square you need a size H hook.

To Start: Ch 5, join with sl st to form a ring.

Round 1: Ch 3, 15 dc in ring, join with sl st in 3rd ch of beginning ch 3.

Round 2: Ch 4, (dc in next dc, ch 1) 15 times, join with sl st in 3rd ch of beginning ch 4.

Round 3: Sl st in next ch 1 sp. Ch 1, sc in same sp, (ch 3, sc in next ch 1 sp) 15 times, ch 3, sl st in beginning sc. {16 ch 3 sps}

Round 4: Sl st in next ch 3 sp, ch 1, sc in same sp, (ch 3, sc in next ch 3 sp) 15 times, ch 3, sl st in beginning sc. {16 ch 3 sps}

Round 5: Ch 1, sc in same st. (3 sc in next ch 3 sp, sc in next sc) 15 times, 3 sc in last ch 3 sp, join with sl st in beginning sc. {64 sc}

Round 6: Ch 4, (dc, ch 2, dc, ch 1, dc) in same st, *(ch 2, sk next sc, hdc in next sc, {ch 2, sk 3 sc, sc in next sc}twice, ch 2, sk 3 sc, hdc in next sc, ch 2, sk next sc, {dc, ch 1, dc, ch 2, dc, ch 1, dc} in next sc.)*twice, ch 2, sk next sc, hdc in next sc, {ch 2, sk 3 sc, sc in next sc}twice, ch 2, sk 3 sc, hdc in next sc, ch 2, sk next sc, join with sl st in 3rd ch of beginning ch 4.

Round 7: St st in next sts until ch 2 sp in corner, ch 3, (dc, ch 2, 2 dc) in same sp, *(dc in next dc, dc in next ch 1 sp, dc in next dc, {2 dc in next ch 2 sp, dc in next st}4 times, 2 dc in next ch 2 sp, dc in next dc, dc in next ch 1 sp, dc in next dc, {2 dc, ch 2, 2 dc} in corner ch 2 sp)*twice, dc in next dc, dc in next ch 1 sp, dc in next dc, {2 dc in next ch 2 sp, dc in next st}4 times, 2 dc in next ch 2 sp, dc in next dc, dc in next ch 1 sp, dc in next dc, join with sl st in 3rd ch of beginning ch 3.

Round 8: Sl st in next dc and into ch 2 sp, ch 1, (sc, ch 2, sc) in same sp, *(sc in back loop only of each dc across, {sc, ch 2, sc} in next ch 2 sp)*twice, sc in back loop only of each dc across, join with sl st in beginning sc.

Round 9: Sl st into corner ch 2 sp, ch 1, (sc, ch 2, sc) in same sp, *(ch 3, sk 2 sc, sc in next sc)8 times across, ch 3, sk 2 sc, (sc, ch 2, sc) in corner ch 2 sp)*twice, (ch 3, sk 2 sc, sc in next sc)8 times across, ch 3, sk 2 sc, join with sl st in 3rd ch of beginning sc.

Round 10: Sl st into corner ch 2 sp, ch 3, (dc, ch 2, 2 dc) in same sp, *(3 dc in each of next 9 ch 3 sps, {2dc, ch 2, 2 dc} in corner ch 2 sp)*twice, 3 dc in each of the next 9 ch 3 sps, join with sl st in 3rd ch of beginning ch 3.

Round 11: Sl st in next dc and into corner ch 2 sp, ch 3, (dc, ch 2, 2 dc) in sampe corner sp, *({ch 1, sk next dc, dc in next dc}15 times, ch 1, sk next dc, {2 dc, ch 2, 2dc} in cornerch 2 sp)*twice, {ch 1, sk next dc, dc in next dc}15 times, ch 1, sk next dc, join with sl st in 3rd ch of beginning ch 3.

Round 12: Sc in each st and each ch 1 sp around, with 3 sc in each corner ch 2 sp, finish off.


The original inspiration came from YarnCrazy. The one she made was a 12" square, and I didn't want one that big. So I tweaked it to make it a 10" square.


Related Posts Plugin for WordPress, Blogger...