Monday, January 30, 2012

Mohawk Hat With Earflaps!

With the upcoming Super Bowl featuring the New York Giants {which just happen to be my favorite team} I decided to make a NY Giants themed mohawk hat!!


Look who's ready for game day!! Go Giants!!!


To make the hat: Using worsted weight, acrylic yarn and a size H hook.
Start off with an adjustable ring, and 12 dc in ring.
Round 1: ch 3 {counts as first dc}, dc in same st as ch 3, dc twice in each dc around, sl st in third ch. {24}
Round 2: ch 3 (counts as first dc}, dc twice in next dc, (dc in next, 2dc in next) around, sl st in third ch. {36}
Round 3: ch 3 {counts as first dc}, (2dc in next dc, dc in next 3 st) around, sl st in third ch. {48}
Round 4: ch 3 {counts as first dc}, (2dc in next dc, dc in next 4 st) around, sl st in third ch. {60}
Round 5: ch 3 {counts as first dc}, (2dc in next dc, dc in next 5 st) around, sl st in third ch. {72}
Round 6 - 7: ch 3 {counts as first dc}, dc in each st around, sl st in third ch, fasten off. {72}
Round 8: Change Color, ch 3 {counts as first dc}, dc in each st around, sl st in third ch, fasten off.{72}
Round 9 - 11: Change color, ch 3 {counts as first dc}, dc in each st around, sl st in third ch, fasten off. {72}
Round 12: Change color, ch 3 {counts as first dc}, dc in each st around, sl st in third ch, fasten off. {72}
Round 13 - 14: Change color, ch 3 {counts as first dc}, dc in each st around, sl st in third ch, fasten off and tuck in extra. {72}

To make ear flap: With the right side facing out, fold the hat in half to find the perfect spot to start the ear flap.
Row 1: Ch 3 {counts as first dc}, dc in next 9 dc, turn. {10}
Row 2: Ch 3 {counts as first dc}, dc2tog, dc next 4 dc, dc2tog, dc in last st, turn. {8}
Row 3: Ch 3 {counts as first dc}, dc2tog, dc next 2 dc, dc2tog, dc in last st, turn. {6}
Row 4: Ch 3 {counts as first dc}, dc2tog twice, dc in last st, turn. {4}
Row 5: Ch 3 {counts as first dc}, dc2tog, dc in last st, fasten off. {2}

Make 2nd ear flap directly across when the hat is folded.

After the second earflap, use any color and sc around the hat to add a border.

Add braided tassels. I cut 4 pieces of yarn of each color to a desired length and pulled it through one of the st at the bottom of the ear flap. Tied it off with a knot and then braided same colored pieces together {should be 8 same colored pieces each}. Tied the bottom off with a knot and cut the extra length.

Now it is time to make the mohawk! Which it is a totally separate piece.

To make mohawk:
Chain 41. {If you are making a smaller hat, chain less. If you are making a bigger hat, chain more. You may stretch the chain over the hat to find the perfect number of chains.}
Row 1: Sc in 2nd ch from hook and in each remaining ch across, turn.
Rows 2 and 3: Ch 1, sc in each sc across, fasten off.

Fringe: For this I cut approximately 120 pieces of red and 120 pieces of blue at about 6" - 8" long.

I had 40 stitches, 6 strands per stitch, which equals the 240 pieces. So depending on how many colors you want to use, and how many stitches you have... just do the math. Each stitch holds 6 pieces. If you have 3 colors, each stitch will hold 2-2-2 of each color, so that'll mean 80 cut pieces of each color. I personally cut them as I went, cutting 5 stitches worth of yarn at a time.

Holding 3 pieces of A and 3 pieces of B together, fold the strands in half. Insert crochet hook, from right side to wrong side to right side again, around a stitch of the center row of Mohawk strip and into the folded strands.


Pull the yarn through the stitch, forming a loop on the right side.


Insert ends of strands into the loop and pull to tighten.


Repeat this process to attach fringe to all of the sc in the center row of Mohawk strip.

Trim fringe to about 2" long.


After you have completed the whole mohawk strip, sew it to the hat. I folded the hat in half, and then pinned the strip to the hat. I sewed the hat on with the acrylic yarn and a plastic needle, but you can also sew it on with regular needle and thread. And there you go!! You're all set to cheer on your team! ... Or just look pretty cool out on a cold winter day. Let me know if you made this and how the pattern is!

Pin It
Saturday, January 28, 2012

Bearded Beanie Hat Pattern

The original post for this Bearded Beanie Hat is located here.

The birthday party for the sweet little 1 year old was today. He got the hats I made him and it was too cute! However, when we tried to get him to wear the bearded hat, it didn't go so well.


Look how cute!! He just wasn't having it, which is a good thing I made the beard removable. I do hope that the beard is something that he could get used to after a little while though. Maybe when it's a little quieter and less people around? As the mom was putting the hat on though, the beard did look a little big.

Which I found very funny! After I made the original pattern, I thought to myself that the beard was way too small. So I made it a little bit longer. However, now, it looks like it would have been perfect the first time around.

There was an 18-month old at the party as well. Just so I could get an idea... we had him try it on. Again, he didn't like the beard. But he was able to wear it for a quick minute so I could snap a picture and get an idea.


Yup. The beard is too big. I think with just the extra length I added onto the side taken off, it should be fine!

I am going to post the pattern for the beard, even though it may not be 100% perfect. If you have a little one in front of you, you could always do a little trial and error. If you attempt this pattern, please let me know! I'd love to hear how it came out and if you changed anything!!


To make the beard:
To start, chain 31.
Row 1 - sc in second ch from hook and in each st across. {30}
Row 2 - ch 1, turn, sc across. {30}
Row 3 - ch 1, turn, sc2tog, sc to last 2 sts, sc2tog {28}
Row 4 - ch 1, turn, sc in next 7 sts, hdc in next 2 sts, dc in next 10 sts, hdc in next 2 sts, sc in last 7 sts {28}
Row 5 - ch 1, turn, sc2tog, sc in next 9 sts, sc2tog, dc in next 2 sts, sc2tog, sc in next 9 sts. {24}
Row 6 - ch 1, turn, sc2tog, sc in next 9 sts, sc2tog, dc in next 2 sts, sc2tog, sc in next 9 sts. {22}
Row 7 - ch 1, turn, sc in next 5 sts, hdc in next st, ch 10, skip 10 sts, hdc in next st, sc in next 5 sts {22}
Row 8 - ch 1, turn, sc in next 4 sts, 3 dc in next st, dc 10 times in ch sp, 3 dc in next st, sc in next 4 sts.
Row 9 - With wrong side facing you, ch 1, sc 6 times on the edge of the beard.
Row 10 - Repeat row 9.
Row 11 - ch 1, turn, sc in next 2 sts, ch 3, skip 2 sts, sc in remaning sts. {This makes the button loop for the removable part of the beard. If you are sewing your beard into the hat, just repeat row 9.} Fasten off.

On the opposite side of the beard, complete row 9-11. Fasten off.


On my original beard, I repeated Row 9 - 3 times instead of just the once. I think that little tiny added length taken off it'll help a lot!

Pin It

Friday, January 27, 2012

Despicable Me Minions Crochet Hat


Look!!! It's a Despicable Me Minion!! I know, I know... how freaking adorable, right???

I once again set out to make this without a real pattern to go by, and I think it turned out awesome! This hat is for a 1 year old, so I used a hat size that'll fit 12-24 month olds.

Hat:
Start off with an adjustable ring, and 13 dc in ring.
Round 1: ch 3 (counts as first dc), dc in same st as ch 3, dc twice in each dc around, sl st in third ch. {26}
Round 2: ch 3 (counts as first dc), dc twice in next dc, (dc in next, 2 dc in next) around, sl st in third ch. {39}
Round 3: ch 3 (counts as first dc), (dc twice in next dc, dc in next 2 st) around, sl st in third ch. {52}
Round 4 - 8: ch 3 (counts as first dc), dc in each st around, sl st in third ch. {52}
Round 9: Change color, ch 3 (counts as first dc), dc in each st around, sl st in third ch. {52}
Round 10 - 11: Change color, ch 3 (counts as first dc), dc in each st around, sl st in third ch. {52}
Round 12: Turn hat so that the right side is facing out. ch 1, sc in each st around, sl st, and finish. {52}

Eye:
{White Part} - In an adjustable ring, make 17 tr, sl st into beginning ch and fasten off.
{Black Part} - In an adjustable ring, make 9 sc, sl st into beginning ch and fasten off.
{Grey Part} - Round 1: In an adjustable ring, make 17 tr, sl st into beginning ch,
Round 2: ch 1, sc around in each st, sl st.
Round 3: ch 1, sc around in each st in FRONT LOOP ONLY, sl st and fasten off.

Sew all of the pieces together, and onto the hat.

To make the hair pieces, I pulled up a strand of black yarn around one of the dc and tied it in a knot. Then cut to an appropriate length. You can do this as little or as many times as you'd like.


And that's it!! So very simple!!


As you can see, he loved the hat!! He didn't wear it long, so she didn't really fool around with it to make it fit perfectly. However, it looks as though I could have gotten away with making it a row or two longer. That might be something you want to keep in mind as you make one using the pattern above.


Pin It

Wednesday, January 25, 2012

Bearded Beanie Hat

I've been wanting to make one of these for a long time. I saw a random picture of someones child with this type of crocheted hat on. Since then I was looking for a pattern for a child's hat, and never found one. So.... here comes in my playing around with some yarn and a hook. This is what I got!


I made this for my cousins little boy. His first birthday party is on Saturday. The best part about this bearded beanie hat is that the beard comes off!!


The beard has button holes and I sewed some buttons into the hat itself. I know how little kids sometimes do not like things on their face, this way, if he doesn't like it, he can still wear the hat.

I did make a pattern for this. However, it has not been tested out on the little boy yet. I have no idea if it'll really work or not the way I made it. So I will not be posting the pattern for a few more days. This is just a little spoiler!


ETA: You can now view the pattern for the beard HERE.


Pin It

Monday, January 23, 2012

Swiffer Sweeper Cover

You don't know how excited I was when I found this Craft pattern on pinterest! I have a swiffer, but haven't used it in years because I hated buying the pads all of the time. This is so wonderful! When you're done, just throw it in the wash and it's good for a new round!


I put this on my Swiffer Wet Jet! I was so excited when it actually fit and worked! The loopy side is to grab all of the dust, or dog hair in my situation. The flat side is for the wet mopping part.


Swiffer Sock Pattern

To Start: With Color A, ch 33.
Row 1: dc in 4th ch from hook (skipped 3 ch counts as dc) and each ch across, turn {31}
Row 2: With Color B, (ch 4, sl st in front loop of next st) across, turn {30 loops}
Row 3: Working in front loop, ch 3 (counts as first dc), dc in next st and each st across, turn {31}
Rows 4–15: Repeat rows 2 and 3, changing colors after every 2 rows (if desired), turn (Compare the sock to your sweeper and repeat these rows as necessary if you’d like to make your rectangle taller.)

From here on, work progresses in the round. Do not turn the work at the end of each round.
Round 1: With A, ch 1, evenly sc around the edge of the rectangle, working 1 sc into top or bottom of each dc and 2 sc into sides of sts, and working 2 sc in each corner st, join with a sl st in first sc {~98}
Round 2: Ch 1, sc in each sc around, join with a sl st in first sc.
Round 3: Ch 1, ((sc in next 7 sc, sc2tog) twice, sc in each sc until 2 sts before corner, (sc2tog) 12 times or as many times as necessary to work up short side until 2 you are 2 sts past short side of rectangle) repeat once more to complete the round, join with a sl st in first sc. {~68}
Round 4: Ch 1, ((sc in next 6 sc, sc2tog) twice, sc in each sc until 2 sts before corner, (sc2tog) six times or as many times as necessary to work up short side until 2 you are 2 sts past short side) repeat once more to complete the round, join with a sl st in first sc {~50}.
Round 5: Ch 1, sc in each sc around, join with a sl st in first sc {50}.
Fasten off and weave in the ends


Pin It

Saturday, January 21, 2012

Lego Blanket!

My nephew loves Lego's! So what did I make for him for his birthday? A lego blanket!


This blanket is so so super cute! I am so happy with the way it turned out! This particular one I made, is not meant to be a huge blanket for him. Not one that'll cover his whole bed or one he can snuggle up in. It's more like a lapgan than an afghan. :)


My step-son loved it so much that he is now begging me to make him one! I got the idea for this blanket on All Things Bright and Beautiful.


{{{ The pattern had to be taken down. It may be purchased through the link above. So sorry for any inconveniences. }}}


Pin It

Monday, January 16, 2012

Playful Ripple Baby Blanket

I made this baby blanket for a friend of mine who is having her baby today! It didn't turn out the exact way I wanted it, because I ran out of the green yarn. The yarn happens to be a discontinued yarn as well, so I couldn't easily go out and buy more.
Even though it is not symmetrical, I think it still looks super cute and is a perfect size for a car seat!

I got the idea for this blanket from Red Heart.

You can make this any length you want. Just make sure your chain is in multiples of 18, +2. I made this blanket with a chain of 74. (18 x 4 +2)

Start and end the blanket with a row of sc: Sc in 2nd ch from hook and next 8
ch, (3 sc in next ch, sc in next 17 ch) until your last ripple, 3 sc in next
ch, sc in last 9 ch; turn

To make a row of regular dc in the ripple pattern: Ch 3, dc2tog, dc in next 7 sc, (3 dc in next sc, dc in next 8 sc, dec dc, dc in next 8 sc) until your last ripple, 3 dc in next sc, dc in next 7 sc, dc2tog, dc in last sc; turn

If you work that row over and over, you'll have a typical ripple afghan. They're one of my favorites.

To put in the "playful" part, or the ripple windows:
Row 1: Ch 1, sc2tog, sc in next 8 dc, (3 sc in next dc, sc in next 8 dc, dec sc, sc in next 8 dc) until your last ripple, 3 sc in next dc, sc in next 8 dc, sc2tog over last dc and ch-3; turn.
Row 2: Ch 3, skip first 2 sc, dc in next sc, (ch 1, skip next sc, dc in next sc) 3 times, * ch 1, skip next sc, (dc, ch 1, dc) in next sc, (ch 1, skip next sc, dc in next sc) 4 times, dec dc, dc in next sc, (ch 1, skip next sc, dc in next sc) 3 times; repeat from * until your last ripple; ch 1, skip next sc, (dc, ch 1, dc) in next sc, (ch 1, skip next sc, dc in next sc) 4 times, skip next sc, dc in last sc; turn.
Row 3: Ch 1, sc2tog, sc in next 8 sts and spaces, (3 sc in next ch-1 space, sc in next 8 sts and spaces, dec sc, sc in next 8 sts and spaces) until your last ripple, 3 sc in next ch-1 space, sc in next 8 sts and spaces, sc2tog; turn.


To finish off the last of this yarn, I also made her a baby beanie hat.

I made an adjustable ring, and made 12 dc in the ring. I increased until I had 48 sts. Just like with this hat.

I did 10 rounds total. This should make a 3-6 month hat. :)

Saturday, January 14, 2012

African Flower Hot Pad


I got the idea to make this hot pad from A Granny A Day blog. It's such a cute idea and will make wonderful gifts for Christmas next year!


It's a very simple pattern and it is quite quick to make! I used a size G hook and 100% cotton yarn for this pattern.

Download the Printable Pattern


African Flower Hot Pad

To Start Front: Make an adjustable ring, or ch 5 and join with slip stitch to form a ring.

Row 1: Ch 3 (count as first dc), 1 dc in ring, (ch 1, 2 dc in ring) 5 times, ch1, join with sl st to first dc {6 shells}
Row 2: Join into a ch space. In each of the 6 ch sps: (2 dc, ch 1, 2 dc). Join with sl st to first dc.
Row 3: Join into a ch space. In each of the 6 ch sps: 7 dc. Join with sl st to first dc.
Row 4: Join at the beginning of the 7 dc sps. 1 sc in each of the next 7 st, dc {which you join to the 2nd row in order to form the petal}, (7 sc and 1 dc) 6 times.
Row 5: Join above any dc st. sc in next 3 sts, 2 sc in next st, (sc in next 7 sts, 2 sc in next st) around. Join with sl st to first sc.
Row 6: Join into last st made. Ch 3 {counts as first dc} and 2dc into the same stitch, (ch1, skip 2 sts and make 3 dc into the next stitch) around. Join with sl st.
Row 7: Join into a ch 1 space. Ch 3 {counts as first dc}, 2dc, ch1, 3dc, {ch1, 3dc into next ch 1 space, ch1, 3dc into next 1ch space, ch1, into the next space 3dc, ch1, 3dc} around. Join with a slst to the 3rd ch of original 3ch.
Row 8: Join into a ch 1 space. Ch 3 {counts as first dc} and 2dc into the same stitch, (ch1, skip 2 sts and make 3 dc into the next stitch) around. Join with sl st.
Row 9: {Optional} Repeat Row 8.

To Start Back: Make an adjustable ring, or ch 5 and join with slip stitch to form a ring.

Row 1: ch 3 {counts as first dc}, 11dc into ring, join with sl st. DO NOT TURN.
Row 2: ch 3 {counts as first dc}, dc into same st, 2dc into each stitch around, join with sl st.
Row 3: ch 3 {counts as first dc}, dc into same st, (2 dc in next st, dc in next) around, join with sl st.
Row 4: ch 3 {counts as first dc}, dc into same st, (2 dc in next st, dc in next 2 sts) around, join with sl st.
Row 5: ch 3 {counts as first dc}, dc into same st, (2 dc in next st, dc in next 3 sts) around, join with sl st.
Row 6: ch 3 {counts as first dc}, dc into same st, (2 dc in next st, dc in next 4 sts) around, join with sl st.
Row 7: ch 3 {counts as first dc}, dc into same st, (2 dc in next st, dc in next 5 sts) around, join with sl st.
Row 8: {if completed optional Row 9 for the front} - ch 3 {counts as first dc}, dc into same st, (2 dc in next st, dc in next 6 sts) around, join with sl st.

Put the two pieces together, right sides facing out. Crochet together with any edging you want. Here is one option.

Edging: Join with sl st. ch1 and sl st into the next stitch, ((sc, hdc, sc) in next st, sl st into the next 2 stitches) around. Now ch as many stitches as you want to make the hanging loop and slst into the same stitch to join the loop.

Sunday, January 1, 2012

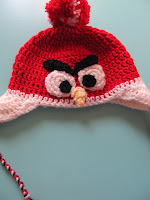
Angry Birds!!

Once I found the awesomeness which is Pinterest, I found the wonderful idea for Angry Bird Hats! After lots of searching, I found very minimal free patterns. I refuse to pay for a pattern! Unless they're in books at a garage sale for a quarter. He he.

I took a little bit of knowledge and a whole lot of "let's see if this works" and made these!


These however were not the first ones that I've made. The first couple that I made were not as good as I feel the red and black ones are above. Here was it was they looked like at first.


I have learned from my mistakes with these hats. Since playing around with a few different ways, and styles of putting these together, I think it's much better now! I came up with a tutorial for you. I do not have a pattern for this... just the tutorial.


I first started out with just a normal hat pattern. I make an adjustable ring, or you can ch 3 and join with a slst into the first ch to make a loop. I then make 10 dc in the ring to start. Row 2 I dc twice in each dc around, Row 3 I (dc, 2dc) around, Row 4 (dc twice in next dc, dc in next 2 dc) around.... so on and so forth like I had done in the previous hats I had made. Each row will have stitches in multiples of 10.

For my younger nephew, I worked till I had 60 stitches around. For my older nephew, I worked till I had 70 stitches around. I then worked about 5 more rows at same amount of stitches around in the same color. After that I switched to the white yarn, and worked one row with that color.

Now I had to crochet all of the goodies. To make the eye I started again with an adjustable ring and made about 7 or 8 sc in the ring. Then, working the same way you did the hat, row 2 had 2 sc in each st, and row 3 had (2 sc, sc in next) around. Then I finished it off.

For the black part, I started with an adjustable ring and worked about 7 sc in the ring. Then I finished it off. I sewed together these two pieces before attaching them to the hat.

The eyebrows I always seem to do differently for each hat. They do have the same basics. I ch about 13, then in the 9th ch, I do a triple/treble crochet. Sometimes I do another triple/treble and sometimes I skip right down to the double. I do a couple double, a couple half double and a couple single. As long as it gets from triple/treble to single... it really doesn't 100% matter how many you make. You may have to play around and see what looks good.

The only thing is, what you do for one eyebrow, make sure you do the exact same to the other!

The beak is something you should play around with also. I ch 5 or 6 and work with dcs. The next row be sure to dc2tog. Sometimes I do this at both ends, sometimes I do it just in the middle. Work your way down to a point. Depending on the hat size, but I try to do no more than 3 or 4 rows.

For the black bird, I thought this would be very difficult to make. This was my first attempt and it came out just the way I imagined!
Starting with the orange, I made an adjustable ring and made 8 dc in the ring. For row 2, I held the right side {the good looking side} away from me. I then dc once in each st around... however, you have to dc in the front loop only! That is what makes the turn. For the last two rows, I switched to the black yarn and dc in each loop, you can go back to going through both loops.

After you join the last round, make sure your tail is long enough to sew into the hat. I used a crochet needle and sewed each stitch through the hat.

For the red hat, and I would probably do the same for the other colors as well, I ch 15 or so, then made 2 or 3 rows of sc. They will curl up and this is what you are looking for! I made two of them for the red hat shown above, at two different lengths.

If you do not want to venture out to make those, you can always make a puff ball like in the first couple of hats I made. Whatever you choose, it's still cute!

The first couple hats I made, I did not do this step. Which is why some of the eyebrows aren't "angry" enough for my liking! But I took out my pins and pinned each of the pieces onto my hat until they were perfect! Then I sewed them on.


Ta da!! All sewed and looking pretty good! The sewing part takes forever for me, it's the part I hate the most.... but it's totally worth it in the end.


I also didn't do this step for the first few I made, which is why some of the angry bird faces are off when they get on the head of the child I made them for. But now I fold the bird in half after I'm done sewing. I count the stitches and determine how long I want the ear flaps. I place the ear flap directly in the middle. I ch between 10-15 dc for the ear flap. Row 2, I ch 3, then dc2tog, ch until there are 3 st left, dc2tog and then dc to finish the row. I continue that pattern until you only one two left.

Be sure to line up the 2nd ear flap with the first. Do that one the exact same way. If you like looking at patterns better, I do have a pattern for ear flaps for this baby hat. You of course want to make it bigger for bigger hats.

After you are done with the 2nd ear flap, join in a st on the back of the hat, and sc a border around the hat and ear flaps in white.

I then join braided tassels, and it's done!


My nephew also wanted the white dot that is in the middle of the black birds forehead. I made the dot the same way I made the black part of the eye. Just 8 or 9 sc in an adjustable ring.


I hope this tutorial is easy to follow. I'll be honest, they are not the prettiest crocheted angry bird hats out there, but they work! My nephews love them and I have already gotten a lot of compliments on them. My brother has told me that a few people are wondering if I sell them. I think i'll be making more in the future!
Related Posts Plugin for WordPress, Blogger...