Henlioc on Instagram recreated the afghan I made from the Grannies and Ripples Afghan pattern!
She did a beautiful job! Thanks for sharing your image!
See the full tutorial HERE!
Showing posts with label pattern. Show all posts
Tuesday, March 8, 2016
Thursday, January 3, 2013
Brick Fireplace Covered Christmas Ornament
I had a hard time coming up with the name of this Christmas ornament. But for some reason it reminded me of a brick fireplace... hence the name!

I used a size 6 Steel crochet hook and size 10 cotton yarn.
To Start: ch 6, join to form a circle.
Row 1: ch 6 (counts as 1-tc and ch-2), *1 tc into circle, ch 2, repeat from * around 7 more times ending with ch-2; join to ch-4 of ch-6.
Row 2: sl st to middle of ch-2, *ch 8, 1 tc into next sp, ch 4, repeat from * around ending with ch-4; join to ch-4 of beg ch-8.
Row 3: sl st to middle of 1st ch-4 sp, ch 4, 2 tc in same sp, ch 4, *3 tc in next sp, ch 4, repeat from * around ending with ch-4; join to ch-4 of beg ch-4.
Row 4: sl st to middle of ch-4 sp, ch 4, 1 tc in same sp, ch 4, *2 tc in next ch-4 sp, ch 4, repeat from * around ending with ch 4; join to ch-4 of beg ch-4.
Row 5: sl st to middle of ch-4 sp, ch 4, 1 tc in same sp, ch 8, *2 tc in next ch-4 sp, ch 8, repeat from * around ending with ch 8; join to ch-4 of beg ch-4.
Finish: sl st to middle of ch-8 sp, tie off leaving a tail long enough to gather loops to pull up around neck of ornament.
Monday, November 12, 2012
Circular Ripple Blanket
So here we are. I've only been working on two projects this past month. One is the baby blanket for my friend. I really liked the way the circular ripple turned out! But you wouldn't believe the number of people who asked what it was, and when I told them it was a blanket their first remarks were "Wow, you have a lot more to go!". My husband even thought it was a tablecloth. LOL
It's a perfect size for a car carrier, or just to snuggle the baby up in. Small so it doesn't drag everywhere, but big enough for what matters.
The pattern I used came from here. But to be honest, I didn't like it. This is how I modified it.
To Start: ch 8, sl st in 1st chain to form ring
Rnd 1: Ch 3, 11 dc in ring, sl st to first ch-3 (12 st)
Rnd 2: Ch 3, dc in same sp, 2 dc in each st around, sl st to first ch-3 (24 st)
Rnd 3: Ch 7, sk next dc, dc in next dc, *ch 4, skip next dc, dc in next dc* - rep from * to * around, sl st in 3rd ch of beginning ch-7 (12 dc, 12 ch-4 spaces)
Rnd 4: Sl st in next ch-4 sp, ch 3, 1 dc in same sp, ch 2, 2 dc in same sp - *2 dc, ch 2, 2 dc in next ch-4 sp*, rep from * to * around, sl st in first ch-3 (12 ch-2 sp)
Rnd 5: sl st into next dc, ch 3, *(2 dc, ch 2, 2 dc) in next ch 2 sp, dc in next dc, sk next 2 dc, dc in next dc* - rep from * to * around, sl st in first ch-3
Rnd 6: sl st into next dc, ch 3, *(2 dc, ch 2, 2 dc) in next ch 2 sp, dc in next dc, sk next 4 dc, dc in next dc* - rep from * to * around, sl st in first ch-3
Rnd 7: sl st into next dc, ch 3, *(2 dc, ch 2, 2 dc) in next ch 2 sp, dc in next 2 dc, sk next 2 dc, dc in next 2 dc* - rep from * to * around, sl st in first ch-3
Rnd 8: sl st into next dc, ch 3, *(2 dc, ch 2, 2 dc) in next ch 2 sp, dc in next 3 dc, sk next 2 dc, dc in next 3 dc* - rep from * to * around, sl st in first ch-3
Rnd 9: sl st into next dc, ch 3, *(2 dc, ch 2, 2 dc) in next ch 2 sp, dc in next 3 dc, sk next 4 dc, dc in next 3 dc* - rep from * to * around, sl st in first ch-3
Rnd 10: sl st into next dc, ch 3, *(2 dc, ch 2, 2 dc) in next ch 2 sp, dc in next 4 dc, sk next 2 dc, dc in next 4 dc* - rep from * to * around, sl st in first ch-3
Rnd 11: sl st into next dc, ch 3, *(2 dc, ch 2, 2 dc) in next ch 2 sp, dc in next 5 dc, sk next 2 dc, dc in next 5 dc* - rep from * to * around, sl st in first ch-3
Rnd 12: sl st into next dc, ch 3, *(2 dc, ch 2, 2 dc) in next ch 2 sp, dc in next 5 dc, sk next 4 dc, dc in next 5 dc* - rep from * to * around, sl st in first ch-3
Rnd 13: sl st into next dc, ch 3, *(2 dc, ch 2, 2 dc) in next ch 2 sp, dc in next 6 dc, sk next 2 dc, dc in next 6 dc* - rep from * to * around, sl st in first ch-3
Rnd 14: sl st into next dc, ch 3, *(2 dc, ch 2, 2 dc) in next ch 2 sp, dc in next 7 dc, sk next 2 dc, dc in next 7 dc* - rep from * to * around, sl st in first ch-3
Rnd 15: sl st into next dc, ch 3, *(2 dc, ch 2, 2 dc) in next ch 2 sp, dc in next 7 dc, sk next 4 dc, dc in next 7 dc* - rep from * to * around, sl st in first ch-3
Rnd 16: sl st into next dc, ch 3, *(2 dc, ch 2, 2 dc) in next ch 2 sp, dc in next 8 dc, sk next 2 dc, dc in next 8 dc* - rep from * to * around, sl st in first ch-3
Rnd 17: sl st into next dc, ch 3, *(2 dc, ch 2, 2 dc) in next ch 2 sp, dc in next 8 dc, sk next 4 dc, dc in next 8 dc* - rep from * to * around, sl st in first ch-3
Rnd 18: sl st into next dc, ch 3, *(2 dc, ch 2, 2 dc) in next ch 2 sp, dc in next 9 c, sk next 2 dc, dc in next 9 dc* - rep from * to * around, sl st in first ch-3
Rnd 19: sl st into next dc, ch 3, *(2 dc, ch 2, 2 dc) in next ch 2 sp, dc in next 9 dc, sk next 4 dc, dc in next 9 dc* - rep from * to * around, sl st in first ch-3
Rnd 20: sl st into next dc, ch 3, *(2 dc, ch 2, 2 dc) in next ch 2 sp, dc in next 10 dc, sk next 2 dc, dc in next 10 dc* - rep from * to * around, sl st in first ch-3
Rnd 21: sl st into next dc, ch 3, *(2 dc, ch 2, 2 dc) in next ch 2 sp, dc in next 10 dc, sk next 4 dc, dc in next 10 dc* - rep from * to * around, sl st in first ch-3
Rnd 22: sl st into next dc, ch 3, *(2 dc, ch 2, 2 dc) in next ch 2 sp, dc in next 11 dc, sk next 2 dc, dc in next 11 dc* - rep from * to * around, sl st in first ch-3
Rnd 23: sl st into next dc, ch 3, *(2 dc, ch 2, 2 dc) in next ch 2 sp, dc in next 11 dc, sk next 4 dc, dc in next 11 dc* - rep from * to * around, sl st in first ch-3
Rnd 24: sl st into next dc, ch 3, *(2 dc, ch 2, 2 dc) in next ch 2 sp, dc in next 12 dc, sk next 2 dc, dc in next 12 dc* - rep from * to * around, sl st in first ch-3
Rnd 25: sl st into next dc, ch 3, *(2 dc, ch 2, 2 dc) in next ch 2 sp, dc in next 12 dc, sk next 4 dc, dc in next 12 dc* - rep from * to * around, sl st in first ch-3
Rnd 26: sl st into next dc, ch 3, *(2 dc, ch 2, 2 dc) in next ch 2 sp, dc in next 13 dc, sk next 2 dc, dc in next 13 dc* - rep from * to * around, sl st in first ch-3, fasten off, weave in ends
Friday, September 21, 2012
Tic Tac Toe Dishcloth

I used a worsted weight cotton yarn and a size H hook.
To Start: Ch 36
Row 1: Dc in 4th ch from hook (counts as first dc), dc in next 8 ch, [ch 2, skip next 2 ch, dc in next 10 ch] 2 times.
Rows 2-4: Ch 3, turn, dc in next 9 dc, [ch 2, sk next 2 chs, dc in next 10 dc] 2 times.
Row 5: Ch 5 (counts as first dc and ch 2), turn, [skip 2 sts, dc in next dc, ch 2] across, ending with dc in last dc.
Row 6: Ch 3, turn, {2 dc in ch-2 sp, dc in next dc} 3 times, [ch 2, skip next ch-2 sp, dc in next dc, {3 dc in ch-2 sp, dc in next dc}3 times] twice.
Rows 7-11: Rep Rows 2-6 once.
Rows 11-14: Rep Rows 2-4 once.
At the end of Row 14, finish off and weave in ends.
STRIPS {Make 4}
- Ch 30, working in BLO, dc in 4th ch from hook, [dc in next ch] across
FINISHING {use photo as guide}
- With right sides of dishcloth and strips facing, weave strips through center open blocks.
EDGING
You can make any style edging you want. In the picture above I did two rounds of sc. Be sure to weave both the strip and the dishcloth together while edging.
Tuesday, September 11, 2012
Crochet Autumn Wreath

I fell in love with it and knew immediately that I had to make it! So, I went right out and grabbed the materials and started to make my version of this Autumn Wreath!
I started with the typical materials, worsted weight yarn (I had to buy the pumpkin orange, all of the other colors I had in my stash), a foam wreath, my hook and my tapestry needle.
Sarah used a Size H Crochet Hook, I decided to use a Size I hook. Thinking that i'd have to crochet less than her beginning chain, I did a couple of rows to test my width, and found that a starter chain of 26 was perfect.
I chained 26, and started my row of sc in the 2nd chain from the hook. So there were 25 sts total across.
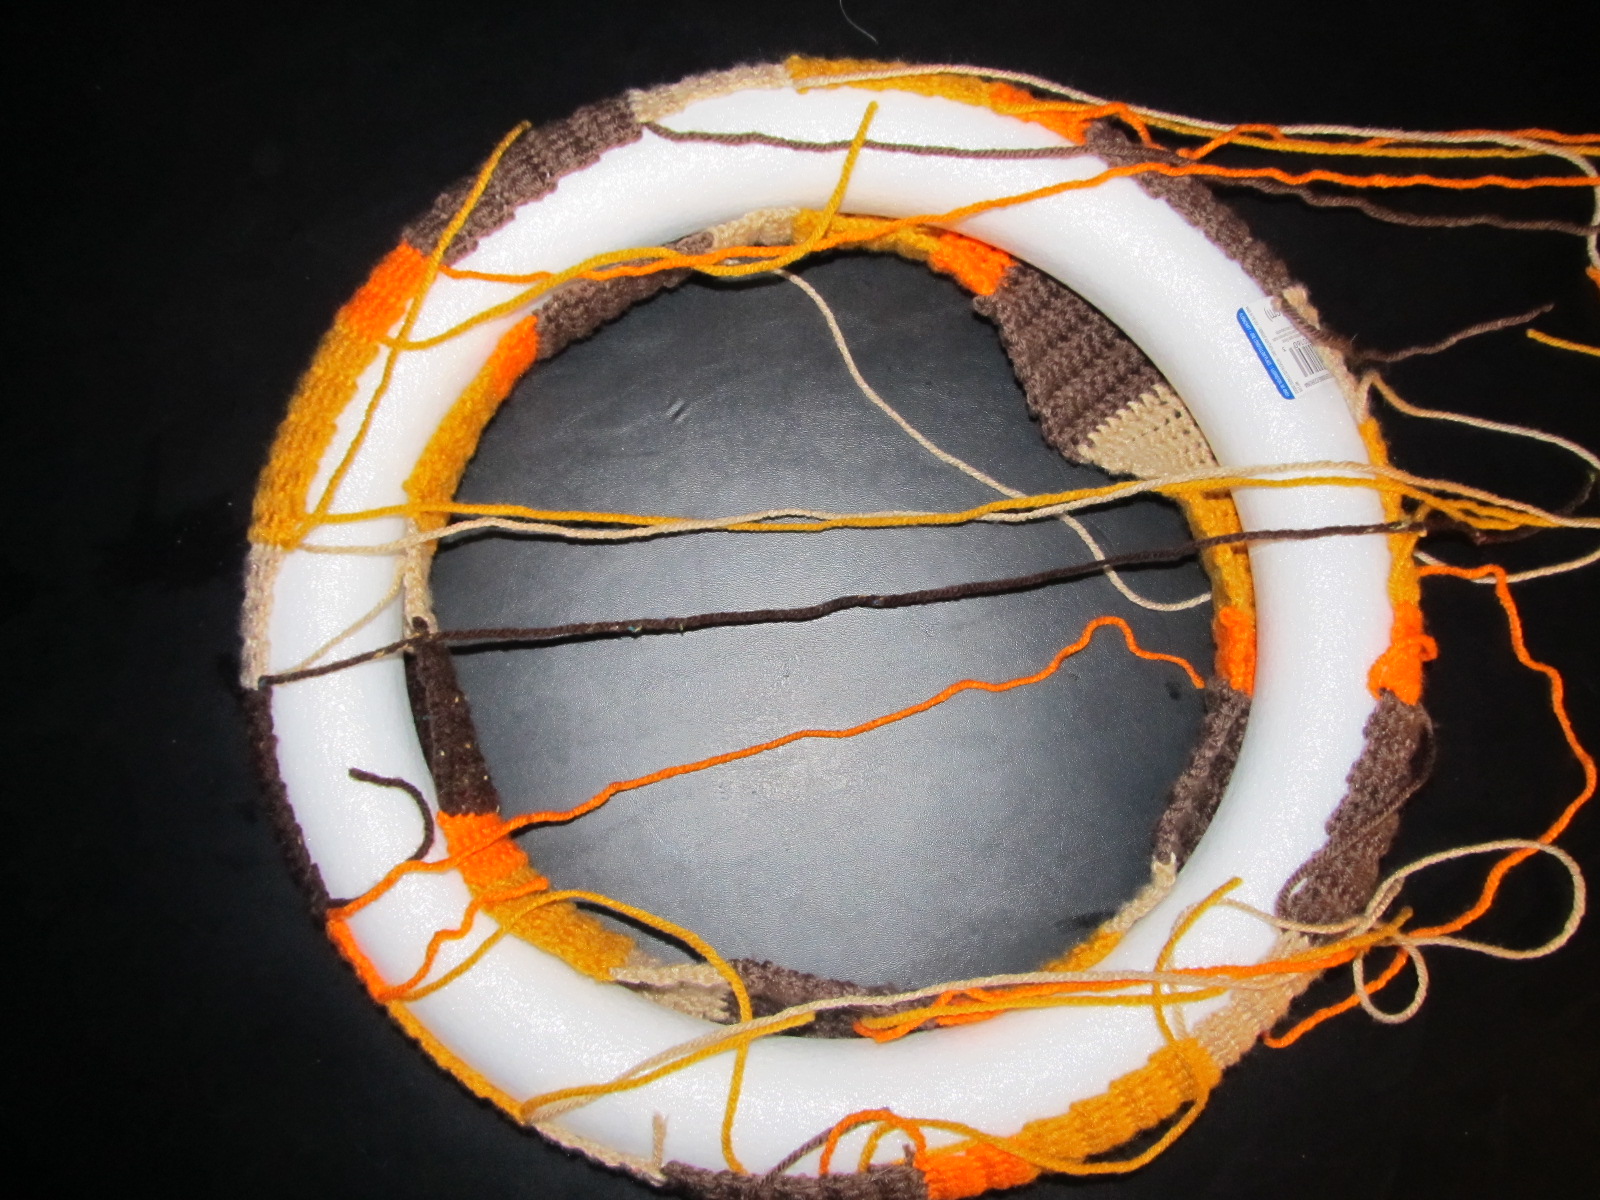
My note to self, while a couple of rows made it perfectly fit. In the end it was almost too tight to sew together. I had to really stretch it out. So next time I will crochet a couple of rows and make sure that they overlap around the foam wreath. {You'll see pictures in a little bit}
Also, next time, instead of spending $8 on a foam wreath.. i'm going to try out another deal I saw on pinterest.

I started to crochet my colors; I designated each color a certain number of even rows. 4, 6, 8 and 10 rows. It worked out that I did this pattern 5 times around.
I left long tails on my ends when I changed colors. When it came time to sew the edges together, I just used the tail. Even though you don't see the back, it gave it more of a seamless feel to it!
Once I was finished, and was satisfied that it fit around my wreath, I sewed end to end and placed it around my foam wreath.
Yes, I did run out of the one brown color and I had to use a second brown. I ended up hiding the odd brown under the bow in the end.
And this is where you can notice how much room is left on the other side.
It did stretch to fit when I sewed the ends together... but it was much more difficult than it needed to be. I'm also now wondering if it would have fit better if I continued on with the colors around and not made it such a tight fit that way.
The bow is the only part I am not happy with on this wreath. Sarah said her bow was 6 sc across and about 3 feet long. Once mine hit 3 feet, I could not form it into a bow I liked, so I went longer.
I ended up crocheting another loop, 10 sc wide and long enough to fit around the foam wreath. I sewed the ends together around the wreath, and put the bow in underneath. I will have to find different way to do a bow the next time I crochet a wreath.
Last but not least, I had to make the pumpkins and leaves!
The pumpkin pattern came from Sarah again. Here is her pattern, she has pretty pictures on her site.
Working in back loops only...
Chain 11,
Row 1: SC in second chain from hook, SC in next, HDC in next 6, SC in last two, chain 1, turn
Row 2: SC across (10 SC)
Row 3-17: Repeat rows 1-2. Leave long tail.
Stitch together row 17 to beginning row.
Just like you would begin to make a single crochet decrease, stitch together one end of the pumpkin. Keep looping the tapestry need under two stitches at a time until it closes. Stuff with poly-fil {I filled it with yarn} and do the same to the other side. Fasten off and weave in ends.
Pumpkin Stem:
Magic ring, 4 SC in magic ring,
2 SC in first stitch, SC in next, repeat around (6 sc)
Continue to SC around until stem is to the desired length and sew together.
The leaf pattern came from Wind Rose Fiber Studio. Here is their pattern:
chain 10 leaving 8” beg tail
Side 1: working in back loops of beginning chain, 3 dc in fourth st from hook, dc in next 3 sts, hdc in next st, sc in next st, sl st in last st, ch 1, sl st in ch just made (leaf point made)
Side 2: working down the other side of the beginning chain in the front loops, sl st in next st, sc in next st, hdc in next st, dc in next 3 sts, work 3 dc in next st, join with sl st to top of beg ch 3
Stem: chain 4, sl st in second st from hook and in next two sts. sl st to next dc, finish off weaving in all loose ends
I made them without the stem.

A little hot glue, because I like to cheat like that, and you have the finished product!! How cute is this?! Not my door though, I just used an inside door instead of finding our wreath hanger {which I think is tucked away with our Christmas stuff} so I could show you on our front door.
My mind is thinking of different ways I can make wreaths for Christmas now!
Plus, i'm thinking about using the Random Stripe Generator to help work my way around!
I hooked up with hooking up on hump day!
Friday, August 3, 2012
Bunny Newborn Baby Prop
I am crocheting some newborn props for my friend over at Shanna Chess Photography, and this, was my first challenge.

Isn't this so adorable!!?
The only real difficult thing to make were the ears... but they weren't that bad.
The hat uses worsted weight yarn and a size I crochet hook.
To Start: Ch 3, sl st in first ch to form ring.
Round 1: Ch 3, dc 11 in ring, sl st in third ch.
Round 2: Ch 3, dc in same st, dc twice in each dc around, sl st in 3rd ch from beginning ch 3. {24}
Round 3: Ch 3, dc twice in next dc. (dc, 2dc) around, dc in last dc, sl st in 3rd ch from beginning ch 3. {36}
Round 4: Ch 3, (dc twice in next dc, dc in next 2 dc) around, sl st in 3rd ch from beginning ch 3. {48}
Round 5-9: Ch 3, dc in each dc around, sl st in 3rd ch from beginning ch 3.
Round 10: Ch 1, turn hat right side out, sc border round the whole hat, sl st in 3rd ch from beginning ch.
To Start Ears: (Make 2 in main color) Ch 20
Round 1: Work 1 dc in 3rd ch from hook, dc in each of the next sts, 8 dc in last stitch. At this point your work should be facing back up the chain. dc in each of the next sts, 4 dc in lat st.
Round 2: Continue in the same fashion as round 1, on the final peak where you'd normally work 8 dc, work 3dc, 2tr, 3dc. sc in next stitch, sl st in next and finish off.
To Start Inner Ears: (Make 2 in secondary color) Ch 18
Round 1: Work hdc in 2nd ch from hook, hdc in next sts, dc in next two sts, tr in next two sts, dc in next two, hdc to the end of the ch, 5 hdc in last sts. On your way back up the chain, wherever you hdc - hdc, where you dc - do a dc and so on and so forth so that it is symmetrical. At the peak, work 3 sc around, and then sc in every stitch as a border.
With wrong sides facing each other, sc the seconadry color into the main color of the ear. I started at the bottom of the seconadry color because there will be extra room at the bottom of the main color. Sc the two sides of the main color ear together once you had made the border all the way around your ear. This will be the part you sew onto the hat.
After you complete the ears, sew them onto the hat. Finish off with a cute flower!
To Start Flower: ch 7, join with sl st to form ring
Row 1: Ch 1, make 14 dc in ring, join with sl st to in first sc.
Row 2: Ch 1, sc in same sc, (ch 3, sk next sc, sc in next sc) 5 times, ch 3, sk next sc, join {7 ch-3 sp}
Row 3: Join new color with sl st in first ch-3 sp, ch 1, (sc, hdc, 3dc, hdc, sc) in same as joining, (sc, hdc, 3dc, hdc, sc) in each ch-3 sp around {7 petals}
Row 4: Ch 1, working behind petals, sc around post of first sc on round 2, ch 4, (sc around post of next sc on round 2, ch 4) around, join and fasten off. {7 ch-4 sp}
Row 5: Sl st in first ch-4 sp, ch 1 .(sc, hdc, dc, 2tr, dc, hdc, sc) in same sp as joining, (sc, hdc, dc, 2tc, dc, hdc, sc) in each ch-4 sp around, fasten off {7 petals}
Sew flower to hat.
The Newborn Diaper Cover Pattern uses worsted weight yarn and a size I crochet hook.
To Start: Ch 15
Row 1: dc in 3rd ch from hook, dc across remaining 12 sts, turn. {13}
Rows 2-9: Ch 3 (counts as dc here and throughout), dc in each ch across, turn. {13}
Rows 10-13: Ch 3, 2 dc in same ch as the ch 3, dc across, 3 dc in last ch, turn. {On Row 13 - 25sts}
Row 14-18: Ch 3, 1 dc in same ch as the ch 3, dc across, 2 dc in last ch, turn. {On Row 18 - 35 sts}
Row 19: Ch 7 {If you will be using a bigger button, ch more here and at the opposite end}, sl st in 5th ch from hook to form loop, dc in same ch, dc across, 2 dc in last, ch 5, sl st with first ch of ch-5 to form loop, turn.
Row 20: Ch 3, 1 dc in same ch, dc across, 7 dc in ch-5 loop.
Border: At this point, you will sc around the entire diaper cover, starting where the last DC touches the side of the diaper cover. After you have made it to the other ch-5 loop on the other side, 7 dc into the loop and fasten off.
Attach a button to the center of the front.
Make a puff ball with the secondary color, and attach it to the back of the diaper cover. Now you have a cute little button tail for your bunny!!
Saturday, July 21, 2012
Poinsettia Christmas Ball
I'm still working on getting a good stock of Christmas gifts. So I started working on a new Christmas Ball Cover.
These Christmas balls look so pretty on a tree! And I always purchase a whole bunch right after the season for cheap!

Poinsettia Christmas Ball
You'll need a steel hook size 5 and size 10 cotton yarn, like Aunt Lydia's.
To Start: Ch 8, join with sl st to form a ring.
Row 1: Ch 1, 16 sc in ring, join with first sc.
Row 2: Ch 1, sc in same sc and in each remaining sc ending with sc; join to first sc.
Row 3: Ch 3, *sc in next sc, ch 3, repeat from * around ending with ch 3; join with first sc.
Row 4: Sl st in next ch of next ch 3 sp and in same sp, ch 8 *dc in next ch 3 sp, ch 5, repeat from * around ending with ch 5; join with sl st in 3rd ch of beginning ch 8.
Row 5: Sl st in next 2 chs of next ch 5 sp, ch 1, * in next ch 5 sp work 5 dc, ch 3, 5dc; sc in next ch 5 sp; repeat from * around ending with dc; join with sl st in first sc.
Row 6: Sl st to 1st ch 3 sp, ch 10, *sc in middle next ch 3 sp, ch 10, repeat from * around ending with sc; ch 6, tc in base of 1st ch 10 to form last ch 10.
Row 7 & 8: Ch 10 * sc in middle of next ch 10, ch 10; repeat from * around ending with sc; ch 6, tc in first ch of first ch 10 to form last ch 10.
Row 9: Ch 10 * sc in middle of next ch 10, ch 10; repeat from * around, join with sl st in beginning sc.
Row 10: 10 sc in each ch 10 space around; join with sl st in beginning sc.
Row 11: Sl st in next 5 sts, {{{At this point and time slip on a ball, you'll be crocheting around the ball.}}} *Ch 10, sk next ch 10 sp, sc in 5th st in the following ch 10 sp, repeat from * around for a total of 4 ch 10 sps; sl st in beginning ch and bind off.
The crocheting should be tight enough around the ball that you do not need to leave a long tail to gather the loops to pull them around the neck of the ornament.
Friday, July 6, 2012
Quilted Crochet Afghan {unfinished}
About a month ago I posted about starting a new afghan using a 10" Square. But I only showed you the one square.
Well, here's the rest of the afghan so far!

I am very pleased with the progress this afghan is making. The only real issue I have, is I do not sew well. Not at all! But, I did whip out these 5 pieces and will make more at some point.
This afghan is a practice afghan, because I want to take clothes that we bought for my daughter and make them into a Crochet Quilt. I wanted to see how well I could sew the squares as well as how well I could crochet around them. Well, I am pleased!! Even though i'd much rather go to the dentist than sew squares. ;)
So right now i'm at a stand still. I do have more fabric to make more squares, but I just don't feel like sewing right now. However, I do want to finish this afghan before I start the one using my daughters clothes! I do know someone who can quilt, and will take her clothes and make them into squares for me..... but I really want to be the one to do it myself.
Anyways, this is how I made the fabric squares!
I started with a Fat Quarter that I found at the craft store for $1! I was able to make the 5 squares out of this. I'm sure a more experienced quilter could do better.

I cut the fabric into 5" squares, and put a piece of batting between two of the pieces. Then after pinning it together, I sewed away!

See how there is fabric on both sides? This way the fabric is a little stronger for the yarn as well as there is no solid front or back to this afghan. It can be placed either way and look beautiful!!

Using the same method I had used in my Crochet Towel Toppers, I hole punched around the square using my 1/16" hole puncher and started crocheting into the holes with a size F hook. After the first initial single crochet, I did a second single crochet using an H hook.

From this point on, I followed this pattern to complete my square!
Round 1: Sl st in next dc and into ch 2 sp, ch 1, (sc, ch 2, sc) in same sp, *(sc in back loop only of each dc across, {sc, ch 2, sc} in next ch 2 sp)*twice, sc in back loop only of each dc across, join with sl st in beginning sc.
Round 2: Sl st into corner ch 2 sp, ch 1, (sc, ch 2, sc) in same sp, *(ch 3, sk 2 sc, sc in next sc)8 times across, ch 3, sk 2 sc, (sc, ch 2, sc) in corner ch 2 sp)*twice, (ch 3, sk 2 sc, sc in next sc)8 times across, ch 3, sk 2 sc, join with sl st in 3rd ch of beginning sc.
Round 3: Sl st into corner ch 2 sp, ch 3, (dc, ch 2, 2 dc) in same sp, *(3 dc in each of next 9 ch 3 sps, {2dc, ch 2, 2 dc} in corner ch 2 sp)*twice, 3 dc in each of the next 9 ch 3 sps, join with sl st in 3rd ch of beginning ch 3.
Round 4: Sl st in next dc and into corner ch 2 sp, ch 3, (dc, ch 2, 2 dc) in sampe corner sp, *({ch 1, sk next dc, dc in next dc}15 times, ch 1, sk next dc, {2 dc, ch 2, 2dc} in cornerch 2 sp)*twice, {ch 1, sk next dc, dc in next dc}15 times, ch 1, sk next dc, join with sl st in 3rd ch of beginning ch 3.
Round 5: Sc in each st and each ch 1 sp around, with 3 sc in each corner ch 2 sp, finish off.

To assemble the afghan, I just took the 10" squares and the quilted squares and sewed them together with a tapestry needle.
I really love the way this afghan is turning out!! It will take me awhile to finish it, but I know when it is finished, it'll be beautiful!!! I think right now i'd like to finish this by Christmas so I can give it away as a gift. That's my goal.
Well, here's the rest of the afghan so far!

I am very pleased with the progress this afghan is making. The only real issue I have, is I do not sew well. Not at all! But, I did whip out these 5 pieces and will make more at some point.
This afghan is a practice afghan, because I want to take clothes that we bought for my daughter and make them into a Crochet Quilt. I wanted to see how well I could sew the squares as well as how well I could crochet around them. Well, I am pleased!! Even though i'd much rather go to the dentist than sew squares. ;)
So right now i'm at a stand still. I do have more fabric to make more squares, but I just don't feel like sewing right now. However, I do want to finish this afghan before I start the one using my daughters clothes! I do know someone who can quilt, and will take her clothes and make them into squares for me..... but I really want to be the one to do it myself.
Anyways, this is how I made the fabric squares!
I started with a Fat Quarter that I found at the craft store for $1! I was able to make the 5 squares out of this. I'm sure a more experienced quilter could do better.
I cut the fabric into 5" squares, and put a piece of batting between two of the pieces. Then after pinning it together, I sewed away!
See how there is fabric on both sides? This way the fabric is a little stronger for the yarn as well as there is no solid front or back to this afghan. It can be placed either way and look beautiful!!
Using the same method I had used in my Crochet Towel Toppers, I hole punched around the square using my 1/16" hole puncher and started crocheting into the holes with a size F hook. After the first initial single crochet, I did a second single crochet using an H hook.
From this point on, I followed this pattern to complete my square!
Round 1: Sl st in next dc and into ch 2 sp, ch 1, (sc, ch 2, sc) in same sp, *(sc in back loop only of each dc across, {sc, ch 2, sc} in next ch 2 sp)*twice, sc in back loop only of each dc across, join with sl st in beginning sc.
Round 2: Sl st into corner ch 2 sp, ch 1, (sc, ch 2, sc) in same sp, *(ch 3, sk 2 sc, sc in next sc)8 times across, ch 3, sk 2 sc, (sc, ch 2, sc) in corner ch 2 sp)*twice, (ch 3, sk 2 sc, sc in next sc)8 times across, ch 3, sk 2 sc, join with sl st in 3rd ch of beginning sc.
Round 3: Sl st into corner ch 2 sp, ch 3, (dc, ch 2, 2 dc) in same sp, *(3 dc in each of next 9 ch 3 sps, {2dc, ch 2, 2 dc} in corner ch 2 sp)*twice, 3 dc in each of the next 9 ch 3 sps, join with sl st in 3rd ch of beginning ch 3.
Round 4: Sl st in next dc and into corner ch 2 sp, ch 3, (dc, ch 2, 2 dc) in sampe corner sp, *({ch 1, sk next dc, dc in next dc}15 times, ch 1, sk next dc, {2 dc, ch 2, 2dc} in cornerch 2 sp)*twice, {ch 1, sk next dc, dc in next dc}15 times, ch 1, sk next dc, join with sl st in 3rd ch of beginning ch 3.
Round 5: Sc in each st and each ch 1 sp around, with 3 sc in each corner ch 2 sp, finish off.
To assemble the afghan, I just took the 10" squares and the quilted squares and sewed them together with a tapestry needle.
I really love the way this afghan is turning out!! It will take me awhile to finish it, but I know when it is finished, it'll be beautiful!!! I think right now i'd like to finish this by Christmas so I can give it away as a gift. That's my goal.
Thursday, June 14, 2012
Baby Blankets

About a month ago I posted about collecting baby blankets for a local mission. It's a mission that hits very near and dear to my heart, and these blankets will go into care packages to be delivered to hospitals.
Thanks to the kind people I work with, and family members, I have already collected a handful of blankets! They range from tiny to big, and are gender specific or gender neutral. Babies are born at different gestational ages, and sometimes a huge blanket would not fit a baby born at 25 weeks.
This blanket is one I've been working on in my spare time. I updated it in a WIPW post a few weeks back. I finished it last night and am very proud. It's one of the smaller blankets, but it can also be stretched.... which is why I like the pattern. The picture really does not do this blanket justice.
I found the pattern at Mini Frippery. It's a fairly simple pattern! I changed the last row, just a tiny smidge.
Row 1: Using this technique of a no chain foundation, 122 dc
Row 2: ch 3, 3 dc in next dc. (ch3, sk next 2 dc, 3 dc in next dc) 40 times. DC in last dc
Row 3: ch 3, (working behind the ch 3 of previous round, 3 Bpdc in 1st dc in 3 dc set, ch 3) 40 times. 3 bpdc in 1st dc in last 3 dc set. Dc in last turning ch of previous row.
Repeat row three until desired length
Last row: ch 3, (dc in next 3 dc,
Here is a blanket a friend made.
I absolutely love the detail of this blanket!! I must ask her for the pattern, because it is just beautiful. It is worked in a round, but a rectangular round. It's just beautiful.
Very simple, and yet beautiful! These blankets are going to be such a nice touch to the care packages. Something hand made with love, in memory of all babies in heaven.
Here's another blanket a co-worker made.
Again, so simple and beautiful!!
And this blanket, I actually made for my nephew when he was born. I had to finish it up after his baby shower... and I honestly never got around to giving it to my sister-in-law. Seeing that my nephew is almost 8 years old, I don't think they'll mind if I donate it.
I wish I had put a border around it. But it was my first granny square blanket ever. As small as it is... it took 7 years until I made another one!
I'll be collecting baby blankets for ever to donate, as unfortunately, there will always be families grieving the loss of a baby.
Tuesday, June 12, 2012
10" Square
Who is the biggest project starter in the world!??! Well, I'm sure there are others worse than I am, but I have to be up there on the list.
I started a new afghan. It's actually a practice one, before I make the one that will really mean something special to me. I actually kind of want to make it a secret new project too... until i'm at least part way finished with it.
But, in this new afghan I do have a new square! It's a 10" square, one of the biggest I have ever made.

Isn't it beautiful!?? I really hope it looks great with the rest of the blanket once I am finished with it!
To make this 10" Square you need a size H hook.
To Start: Ch 5, join with sl st to form a ring.
Round 1: Ch 3, 15 dc in ring, join with sl st in 3rd ch of beginning ch 3.
Round 2: Ch 4, (dc in next dc, ch 1) 15 times, join with sl st in 3rd ch of beginning ch 4.
Round 3: Sl st in next ch 1 sp. Ch 1, sc in same sp, (ch 3, sc in next ch 1 sp) 15 times, ch 3, sl st in beginning sc. {16 ch 3 sps}
Round 4: Sl st in next ch 3 sp, ch 1, sc in same sp, (ch 3, sc in next ch 3 sp) 15 times, ch 3, sl st in beginning sc. {16 ch 3 sps}
Round 5: Ch 1, sc in same st. (3 sc in next ch 3 sp, sc in next sc) 15 times, 3 sc in last ch 3 sp, join with sl st in beginning sc. {64 sc}
Round 6: Ch 4, (dc, ch 2, dc, ch 1, dc) in same st, *(ch 2, sk next sc, hdc in next sc, {ch 2, sk 3 sc, sc in next sc}twice, ch 2, sk 3 sc, hdc in next sc, ch 2, sk next sc, {dc, ch 1, dc, ch 2, dc, ch 1, dc} in next sc.)*twice, ch 2, sk next sc, hdc in next sc, {ch 2, sk 3 sc, sc in next sc}twice, ch 2, sk 3 sc, hdc in next sc, ch 2, sk next sc, join with sl st in 3rd ch of beginning ch 4.
Round 7: St st in next sts until ch 2 sp in corner, ch 3, (dc, ch 2, 2 dc) in same sp, *(dc in next dc, dc in next ch 1 sp, dc in next dc, {2 dc in next ch 2 sp, dc in next st}4 times, 2 dc in next ch 2 sp, dc in next dc, dc in next ch 1 sp, dc in next dc, {2 dc, ch 2, 2 dc} in corner ch 2 sp)*twice, dc in next dc, dc in next ch 1 sp, dc in next dc, {2 dc in next ch 2 sp, dc in next st}4 times, 2 dc in next ch 2 sp, dc in next dc, dc in next ch 1 sp, dc in next dc, join with sl st in 3rd ch of beginning ch 3.
Round 8: Sl st in next dc and into ch 2 sp, ch 1, (sc, ch 2, sc) in same sp, *(sc in back loop only of each dc across, {sc, ch 2, sc} in next ch 2 sp)*twice, sc in back loop only of each dc across, join with sl st in beginning sc.
Round 9: Sl st into corner ch 2 sp, ch 1, (sc, ch 2, sc) in same sp, *(ch 3, sk 2 sc, sc in next sc)8 times across, ch 3, sk 2 sc, (sc, ch 2, sc) in corner ch 2 sp)*twice, (ch 3, sk 2 sc, sc in next sc)8 times across, ch 3, sk 2 sc, join with sl st in 3rd ch of beginning sc.
Round 10: Sl st into corner ch 2 sp, ch 3, (dc, ch 2, 2 dc) in same sp, *(3 dc in each of next 9 ch 3 sps, {2dc, ch 2, 2 dc} in corner ch 2 sp)*twice, 3 dc in each of the next 9 ch 3 sps, join with sl st in 3rd ch of beginning ch 3.
Round 11: Sl st in next dc and into corner ch 2 sp, ch 3, (dc, ch 2, 2 dc) in sampe corner sp, *({ch 1, sk next dc, dc in next dc}15 times, ch 1, sk next dc, {2 dc, ch 2, 2dc} in cornerch 2 sp)*twice, {ch 1, sk next dc, dc in next dc}15 times, ch 1, sk next dc, join with sl st in 3rd ch of beginning ch 3.
Round 12: Sc in each st and each ch 1 sp around, with 3 sc in each corner ch 2 sp, finish off.

The original inspiration came from YarnCrazy. The one she made was a 12" square, and I didn't want one that big. So I tweaked it to make it a 10" square.
I started a new afghan. It's actually a practice one, before I make the one that will really mean something special to me. I actually kind of want to make it a secret new project too... until i'm at least part way finished with it.
But, in this new afghan I do have a new square! It's a 10" square, one of the biggest I have ever made.
Isn't it beautiful!?? I really hope it looks great with the rest of the blanket once I am finished with it!
To make this 10" Square you need a size H hook.
To Start: Ch 5, join with sl st to form a ring.
Round 1: Ch 3, 15 dc in ring, join with sl st in 3rd ch of beginning ch 3.
Round 2: Ch 4, (dc in next dc, ch 1) 15 times, join with sl st in 3rd ch of beginning ch 4.
Round 3: Sl st in next ch 1 sp. Ch 1, sc in same sp, (ch 3, sc in next ch 1 sp) 15 times, ch 3, sl st in beginning sc. {16 ch 3 sps}
Round 4: Sl st in next ch 3 sp, ch 1, sc in same sp, (ch 3, sc in next ch 3 sp) 15 times, ch 3, sl st in beginning sc. {16 ch 3 sps}
Round 5: Ch 1, sc in same st. (3 sc in next ch 3 sp, sc in next sc) 15 times, 3 sc in last ch 3 sp, join with sl st in beginning sc. {64 sc}
Round 6: Ch 4, (dc, ch 2, dc, ch 1, dc) in same st, *(ch 2, sk next sc, hdc in next sc, {ch 2, sk 3 sc, sc in next sc}twice, ch 2, sk 3 sc, hdc in next sc, ch 2, sk next sc, {dc, ch 1, dc, ch 2, dc, ch 1, dc} in next sc.)*twice, ch 2, sk next sc, hdc in next sc, {ch 2, sk 3 sc, sc in next sc}twice, ch 2, sk 3 sc, hdc in next sc, ch 2, sk next sc, join with sl st in 3rd ch of beginning ch 4.
Round 7: St st in next sts until ch 2 sp in corner, ch 3, (dc, ch 2, 2 dc) in same sp, *(dc in next dc, dc in next ch 1 sp, dc in next dc, {2 dc in next ch 2 sp, dc in next st}4 times, 2 dc in next ch 2 sp, dc in next dc, dc in next ch 1 sp, dc in next dc, {2 dc, ch 2, 2 dc} in corner ch 2 sp)*twice, dc in next dc, dc in next ch 1 sp, dc in next dc, {2 dc in next ch 2 sp, dc in next st}4 times, 2 dc in next ch 2 sp, dc in next dc, dc in next ch 1 sp, dc in next dc, join with sl st in 3rd ch of beginning ch 3.
Round 8: Sl st in next dc and into ch 2 sp, ch 1, (sc, ch 2, sc) in same sp, *(sc in back loop only of each dc across, {sc, ch 2, sc} in next ch 2 sp)*twice, sc in back loop only of each dc across, join with sl st in beginning sc.
Round 9: Sl st into corner ch 2 sp, ch 1, (sc, ch 2, sc) in same sp, *(ch 3, sk 2 sc, sc in next sc)8 times across, ch 3, sk 2 sc, (sc, ch 2, sc) in corner ch 2 sp)*twice, (ch 3, sk 2 sc, sc in next sc)8 times across, ch 3, sk 2 sc, join with sl st in 3rd ch of beginning sc.
Round 10: Sl st into corner ch 2 sp, ch 3, (dc, ch 2, 2 dc) in same sp, *(3 dc in each of next 9 ch 3 sps, {2dc, ch 2, 2 dc} in corner ch 2 sp)*twice, 3 dc in each of the next 9 ch 3 sps, join with sl st in 3rd ch of beginning ch 3.
Round 11: Sl st in next dc and into corner ch 2 sp, ch 3, (dc, ch 2, 2 dc) in sampe corner sp, *({ch 1, sk next dc, dc in next dc}15 times, ch 1, sk next dc, {2 dc, ch 2, 2dc} in cornerch 2 sp)*twice, {ch 1, sk next dc, dc in next dc}15 times, ch 1, sk next dc, join with sl st in 3rd ch of beginning ch 3.
Round 12: Sc in each st and each ch 1 sp around, with 3 sc in each corner ch 2 sp, finish off.
The original inspiration came from YarnCrazy. The one she made was a 12" square, and I didn't want one that big. So I tweaked it to make it a 10" square.
Subscribe to:
Posts (Atom)